Primary Care Clinician
These instructions will help guide you through the process on how to complete the following for the Primary Care Clinician role:
Add a New Profile
Edit a Profile
Deactivate a Profile
Add a New Profile
To add a new Primary Care Clinician profile:
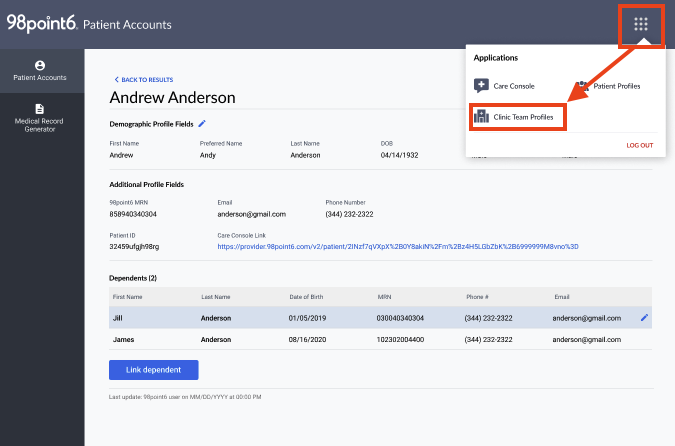
Select the menu icon, and then select Clinic Team Profiles.
Select Add New Profile.

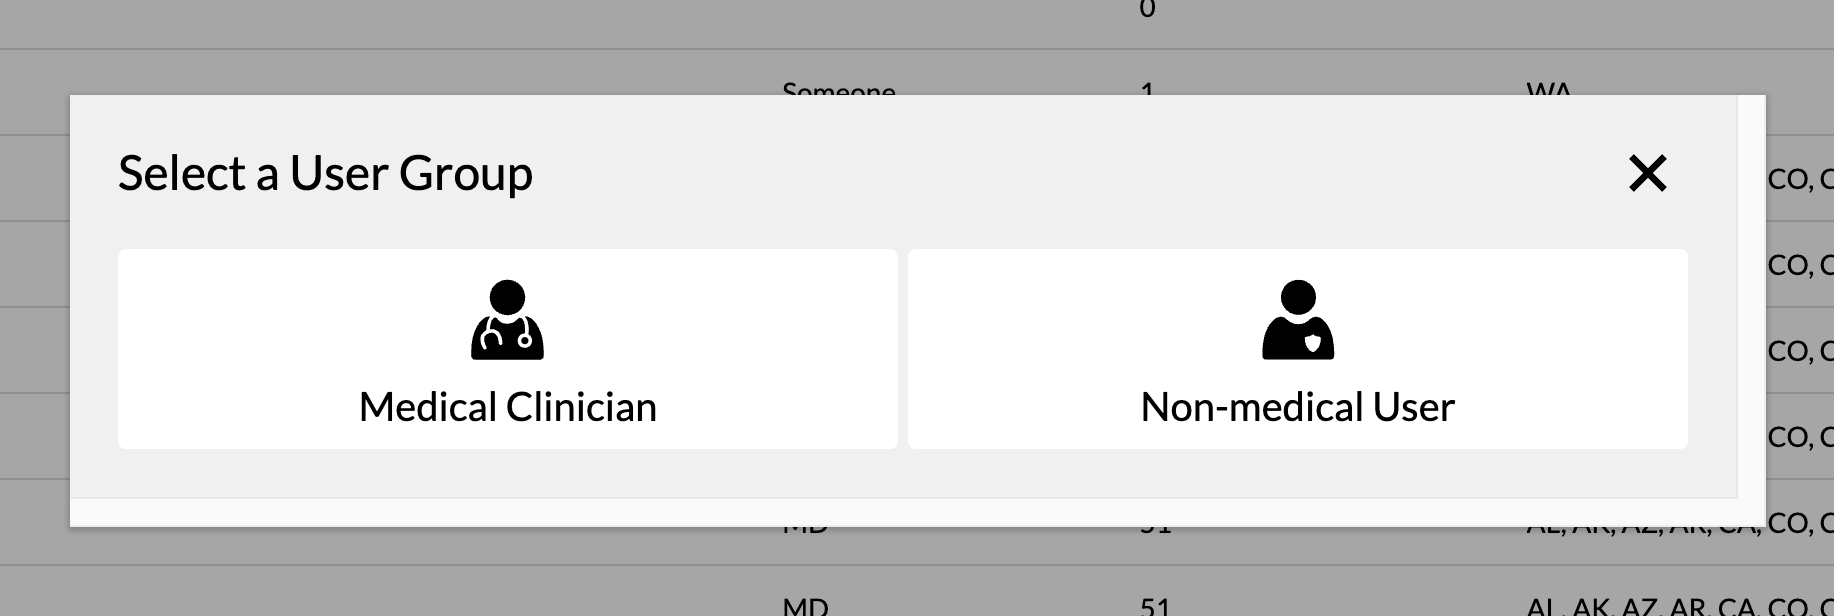
Select Medical Clinician as the User Group. (See Roles to learn more about the privileges assigned to each role.)
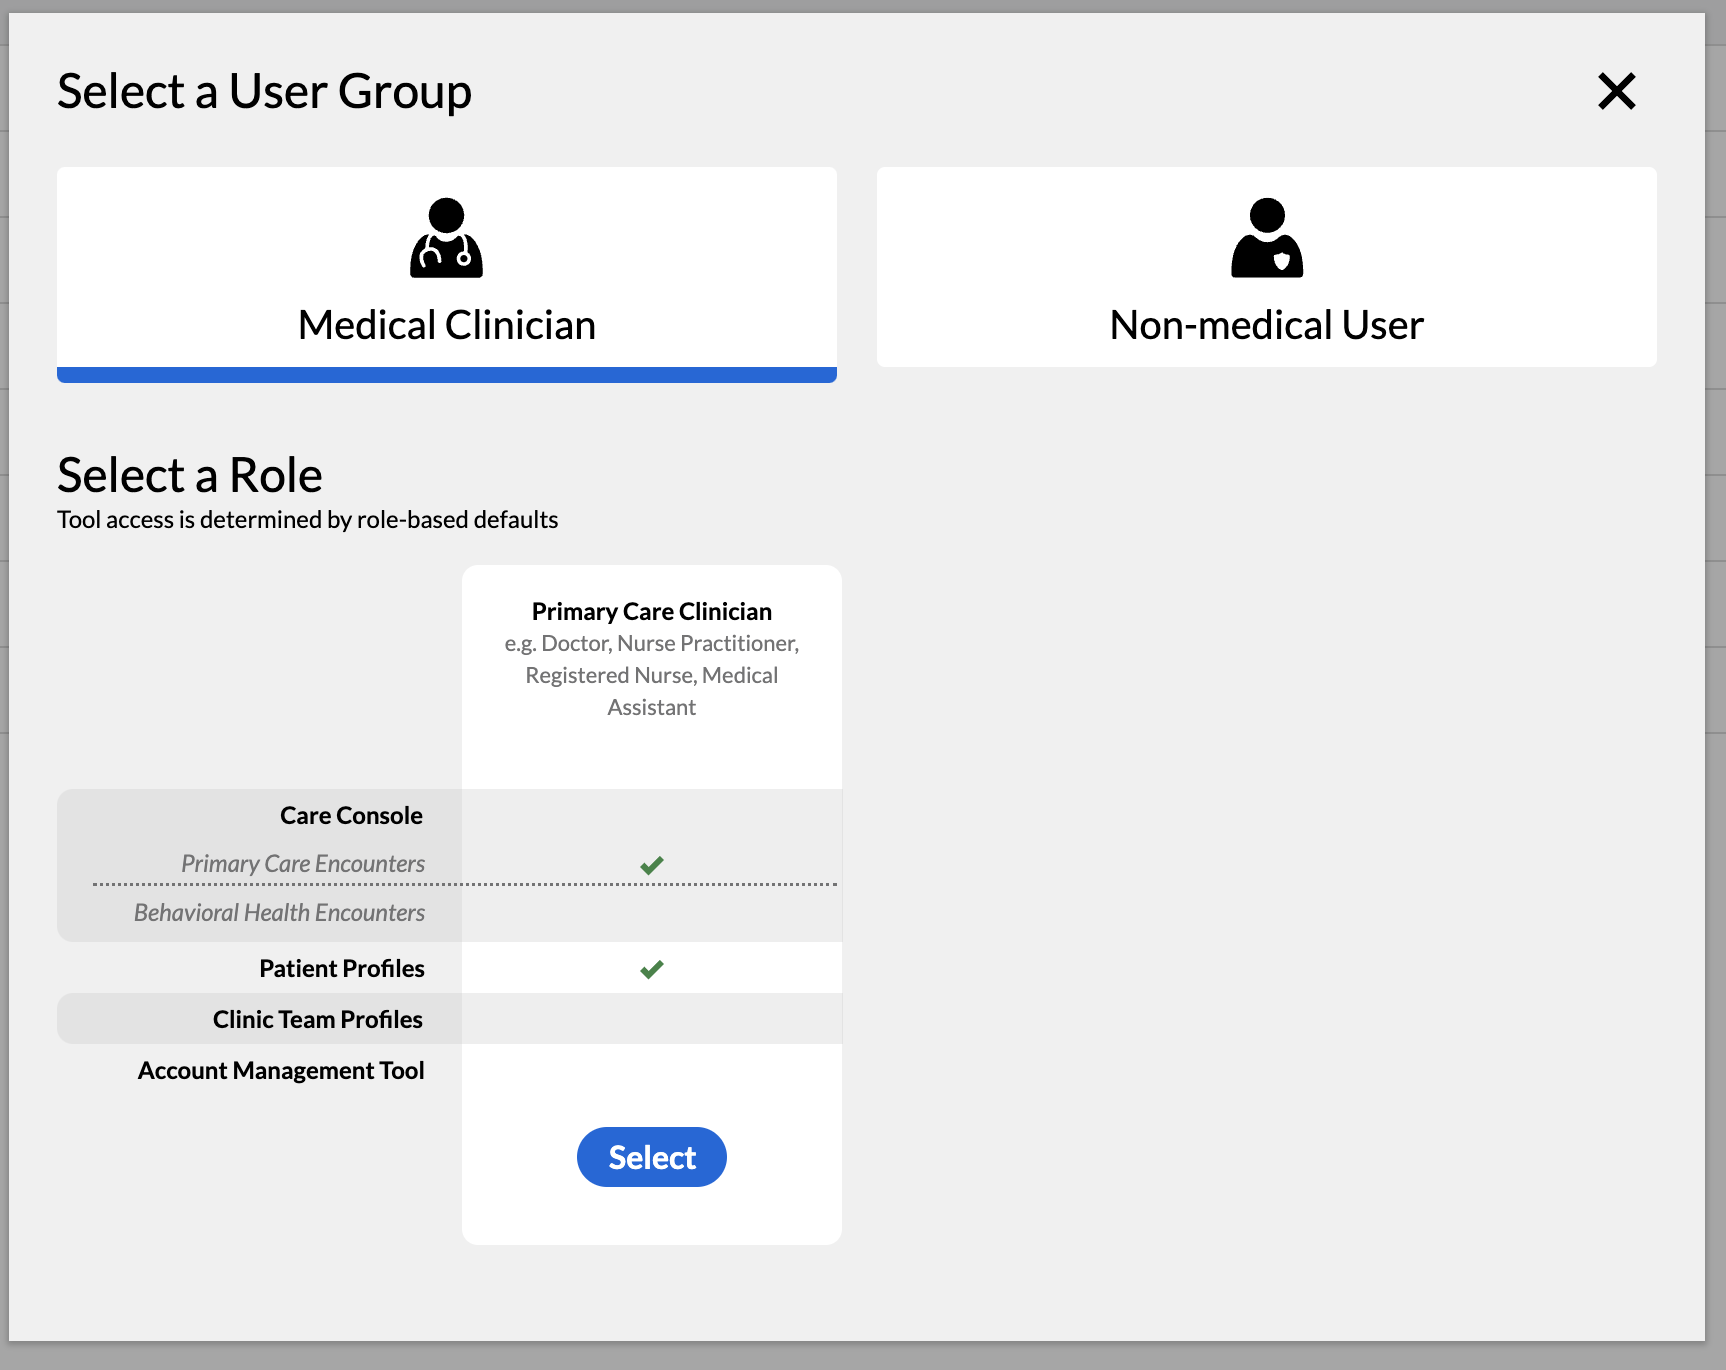
Click to select the Primary Care Clinician role.
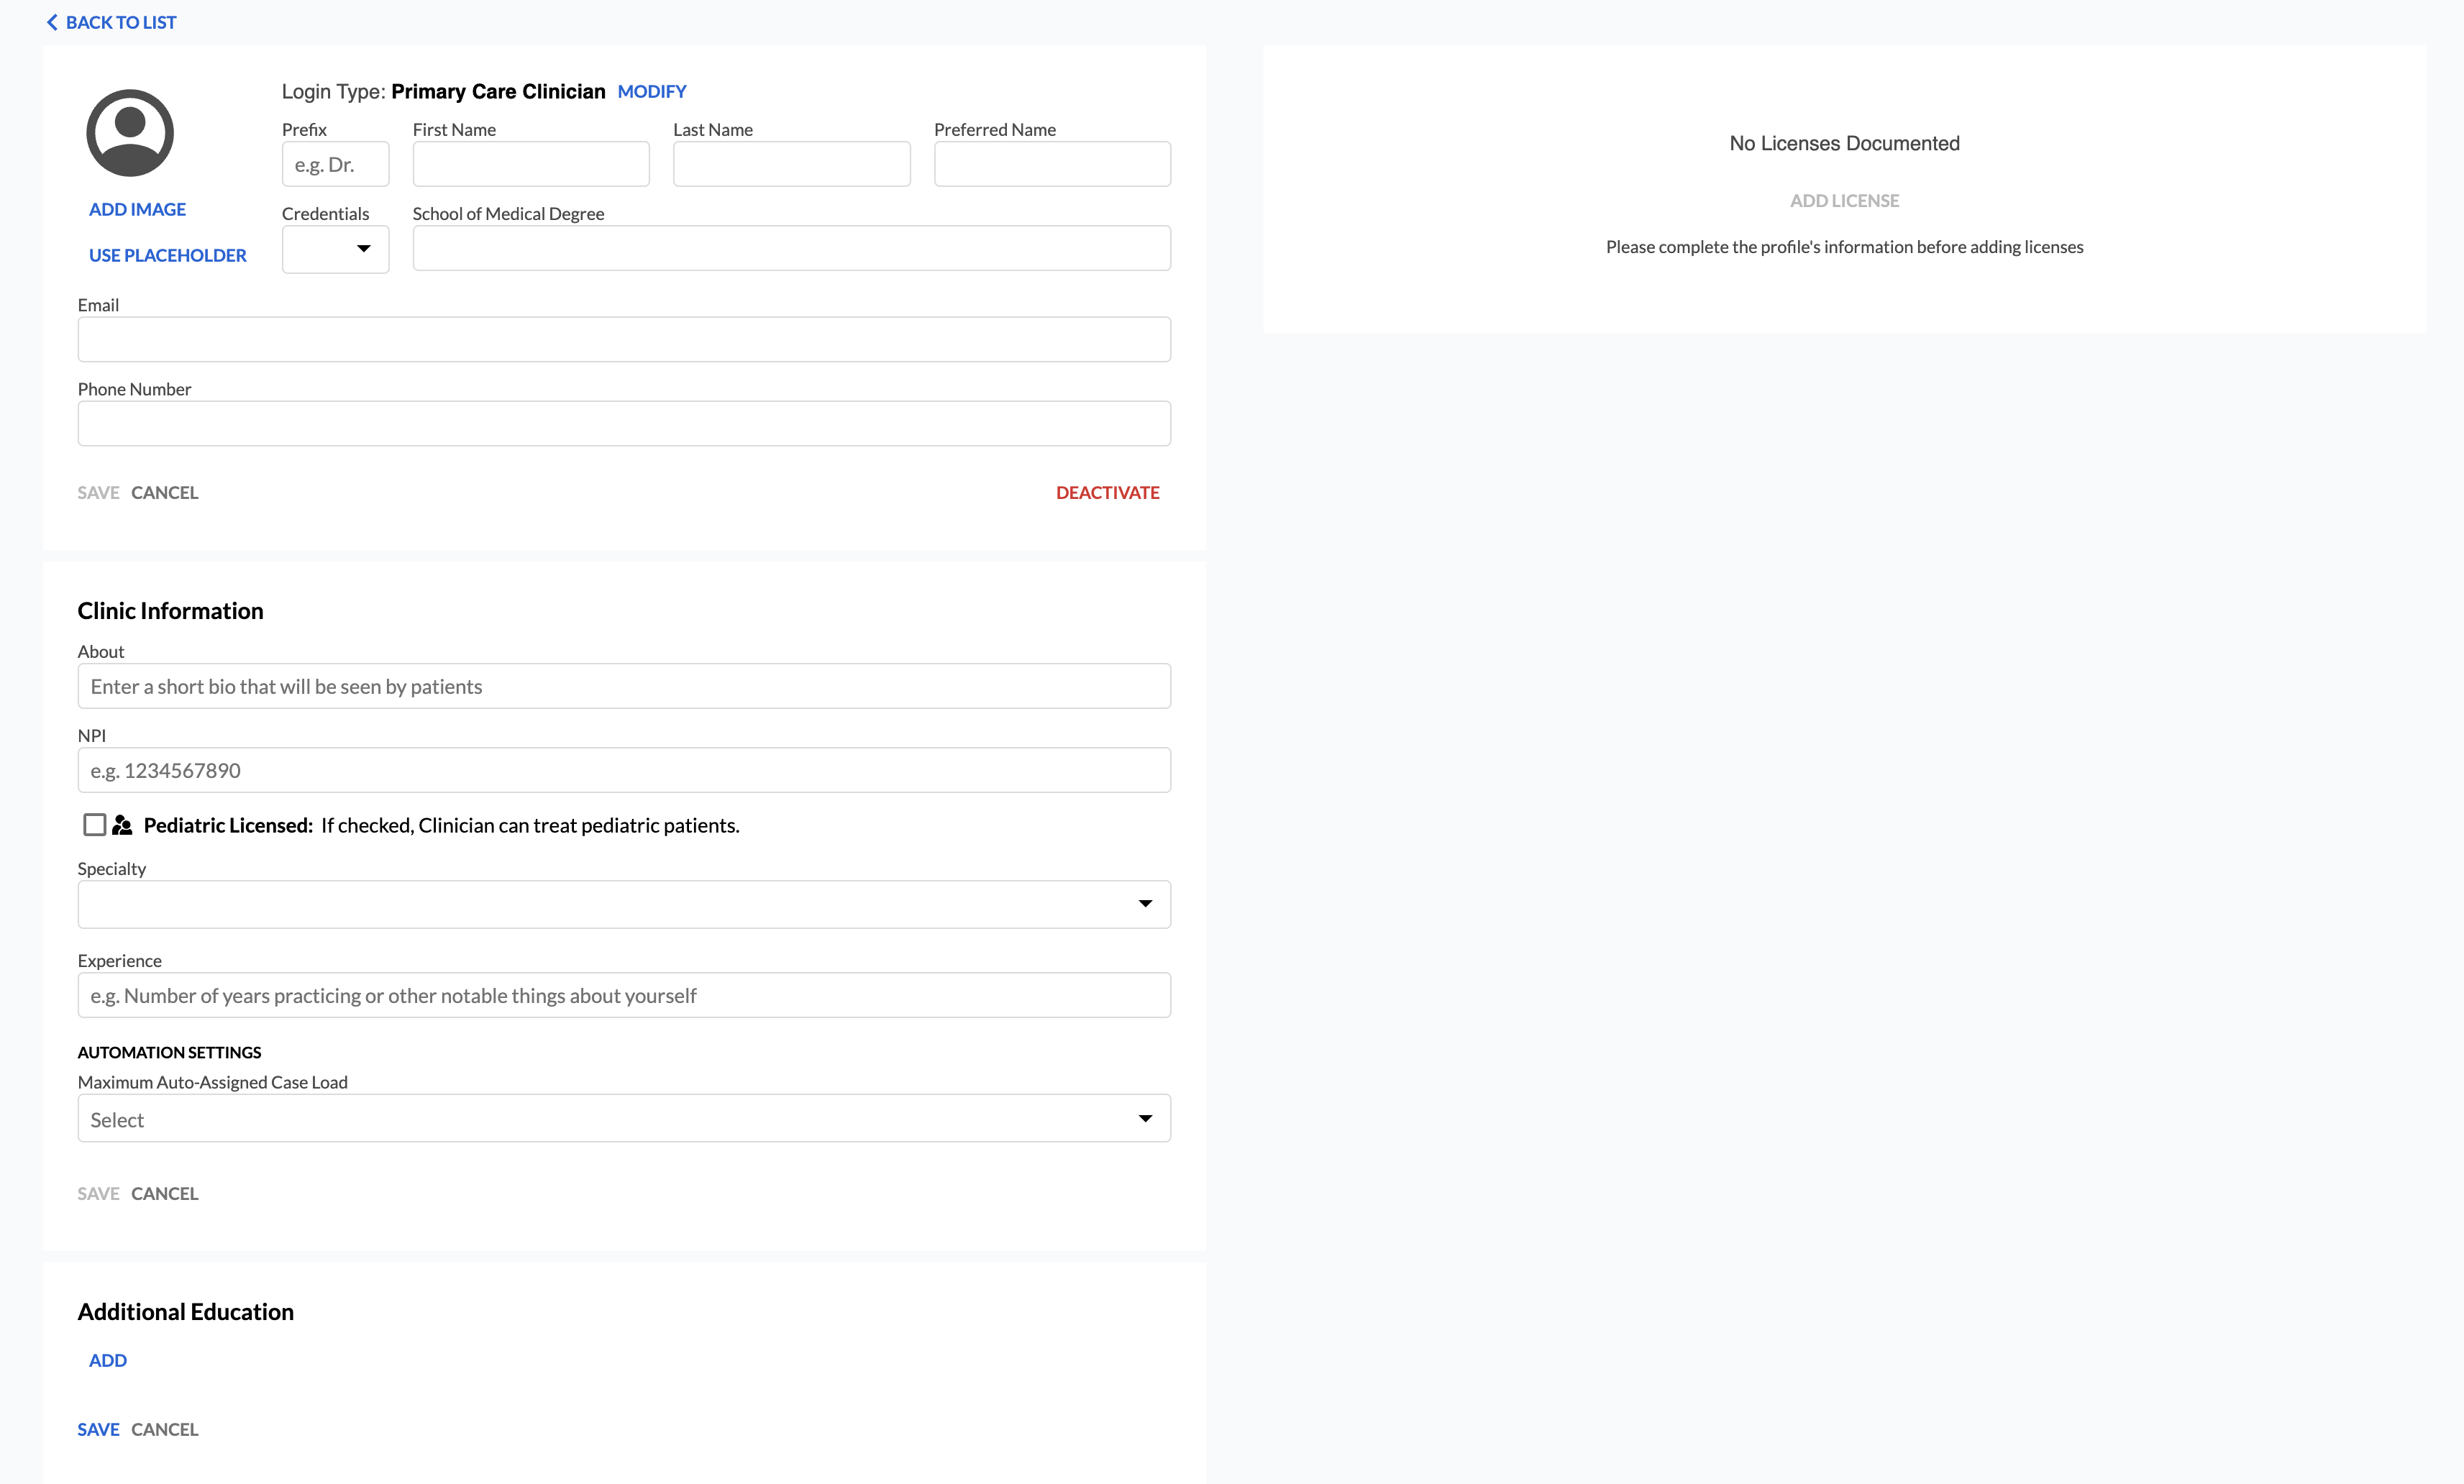
Enter the desired information into the Prefix Title, First Name, Last Name, Preferred Name, School of Medical Degree, Email, and Phone Number fields.
NOTE: The Prefix Title, First Name, Last Name, Credentials (below), and Email fields are required.
While email field must be unique, phone number does not need to be unique for users configured in the same environment
Use the Credentials drop-down menu to select the credentials of the clinician.
NOTE: Only one credential can be selected at this time.
Select Add Image (no larger than 480x480) to add an image of the clinician, and then select Save.
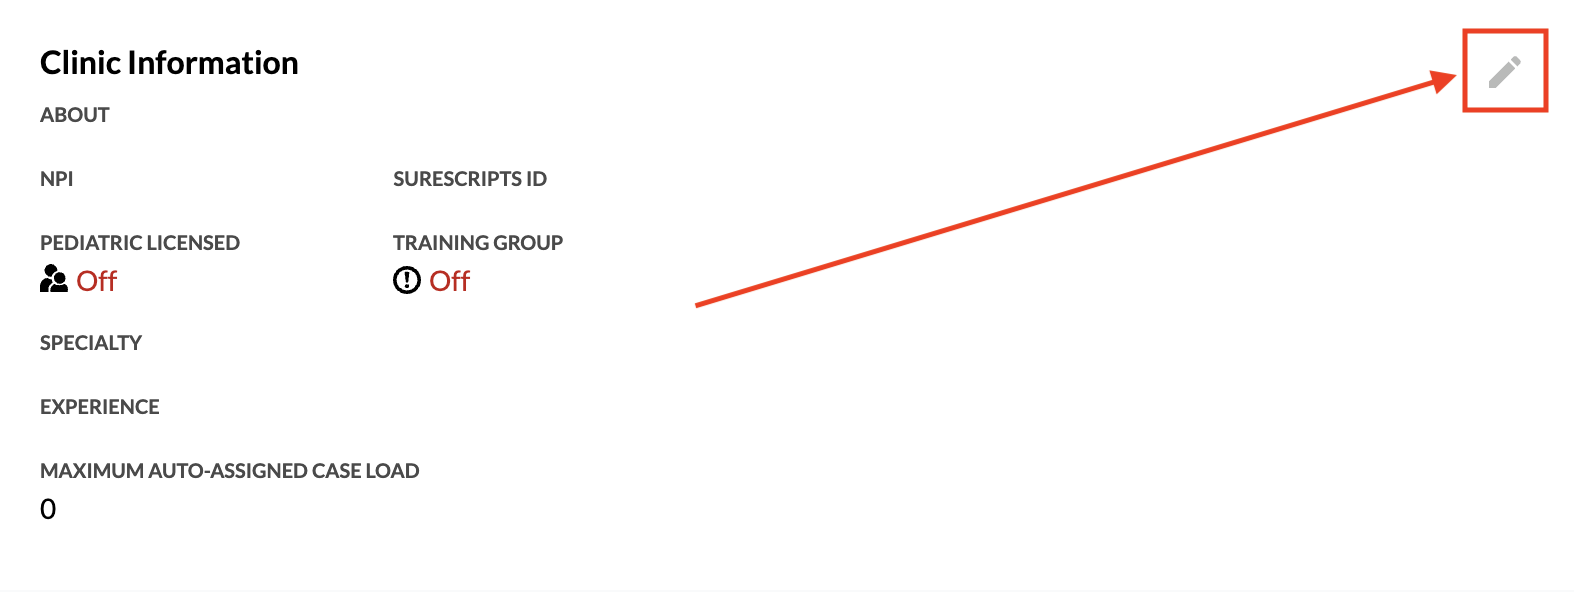
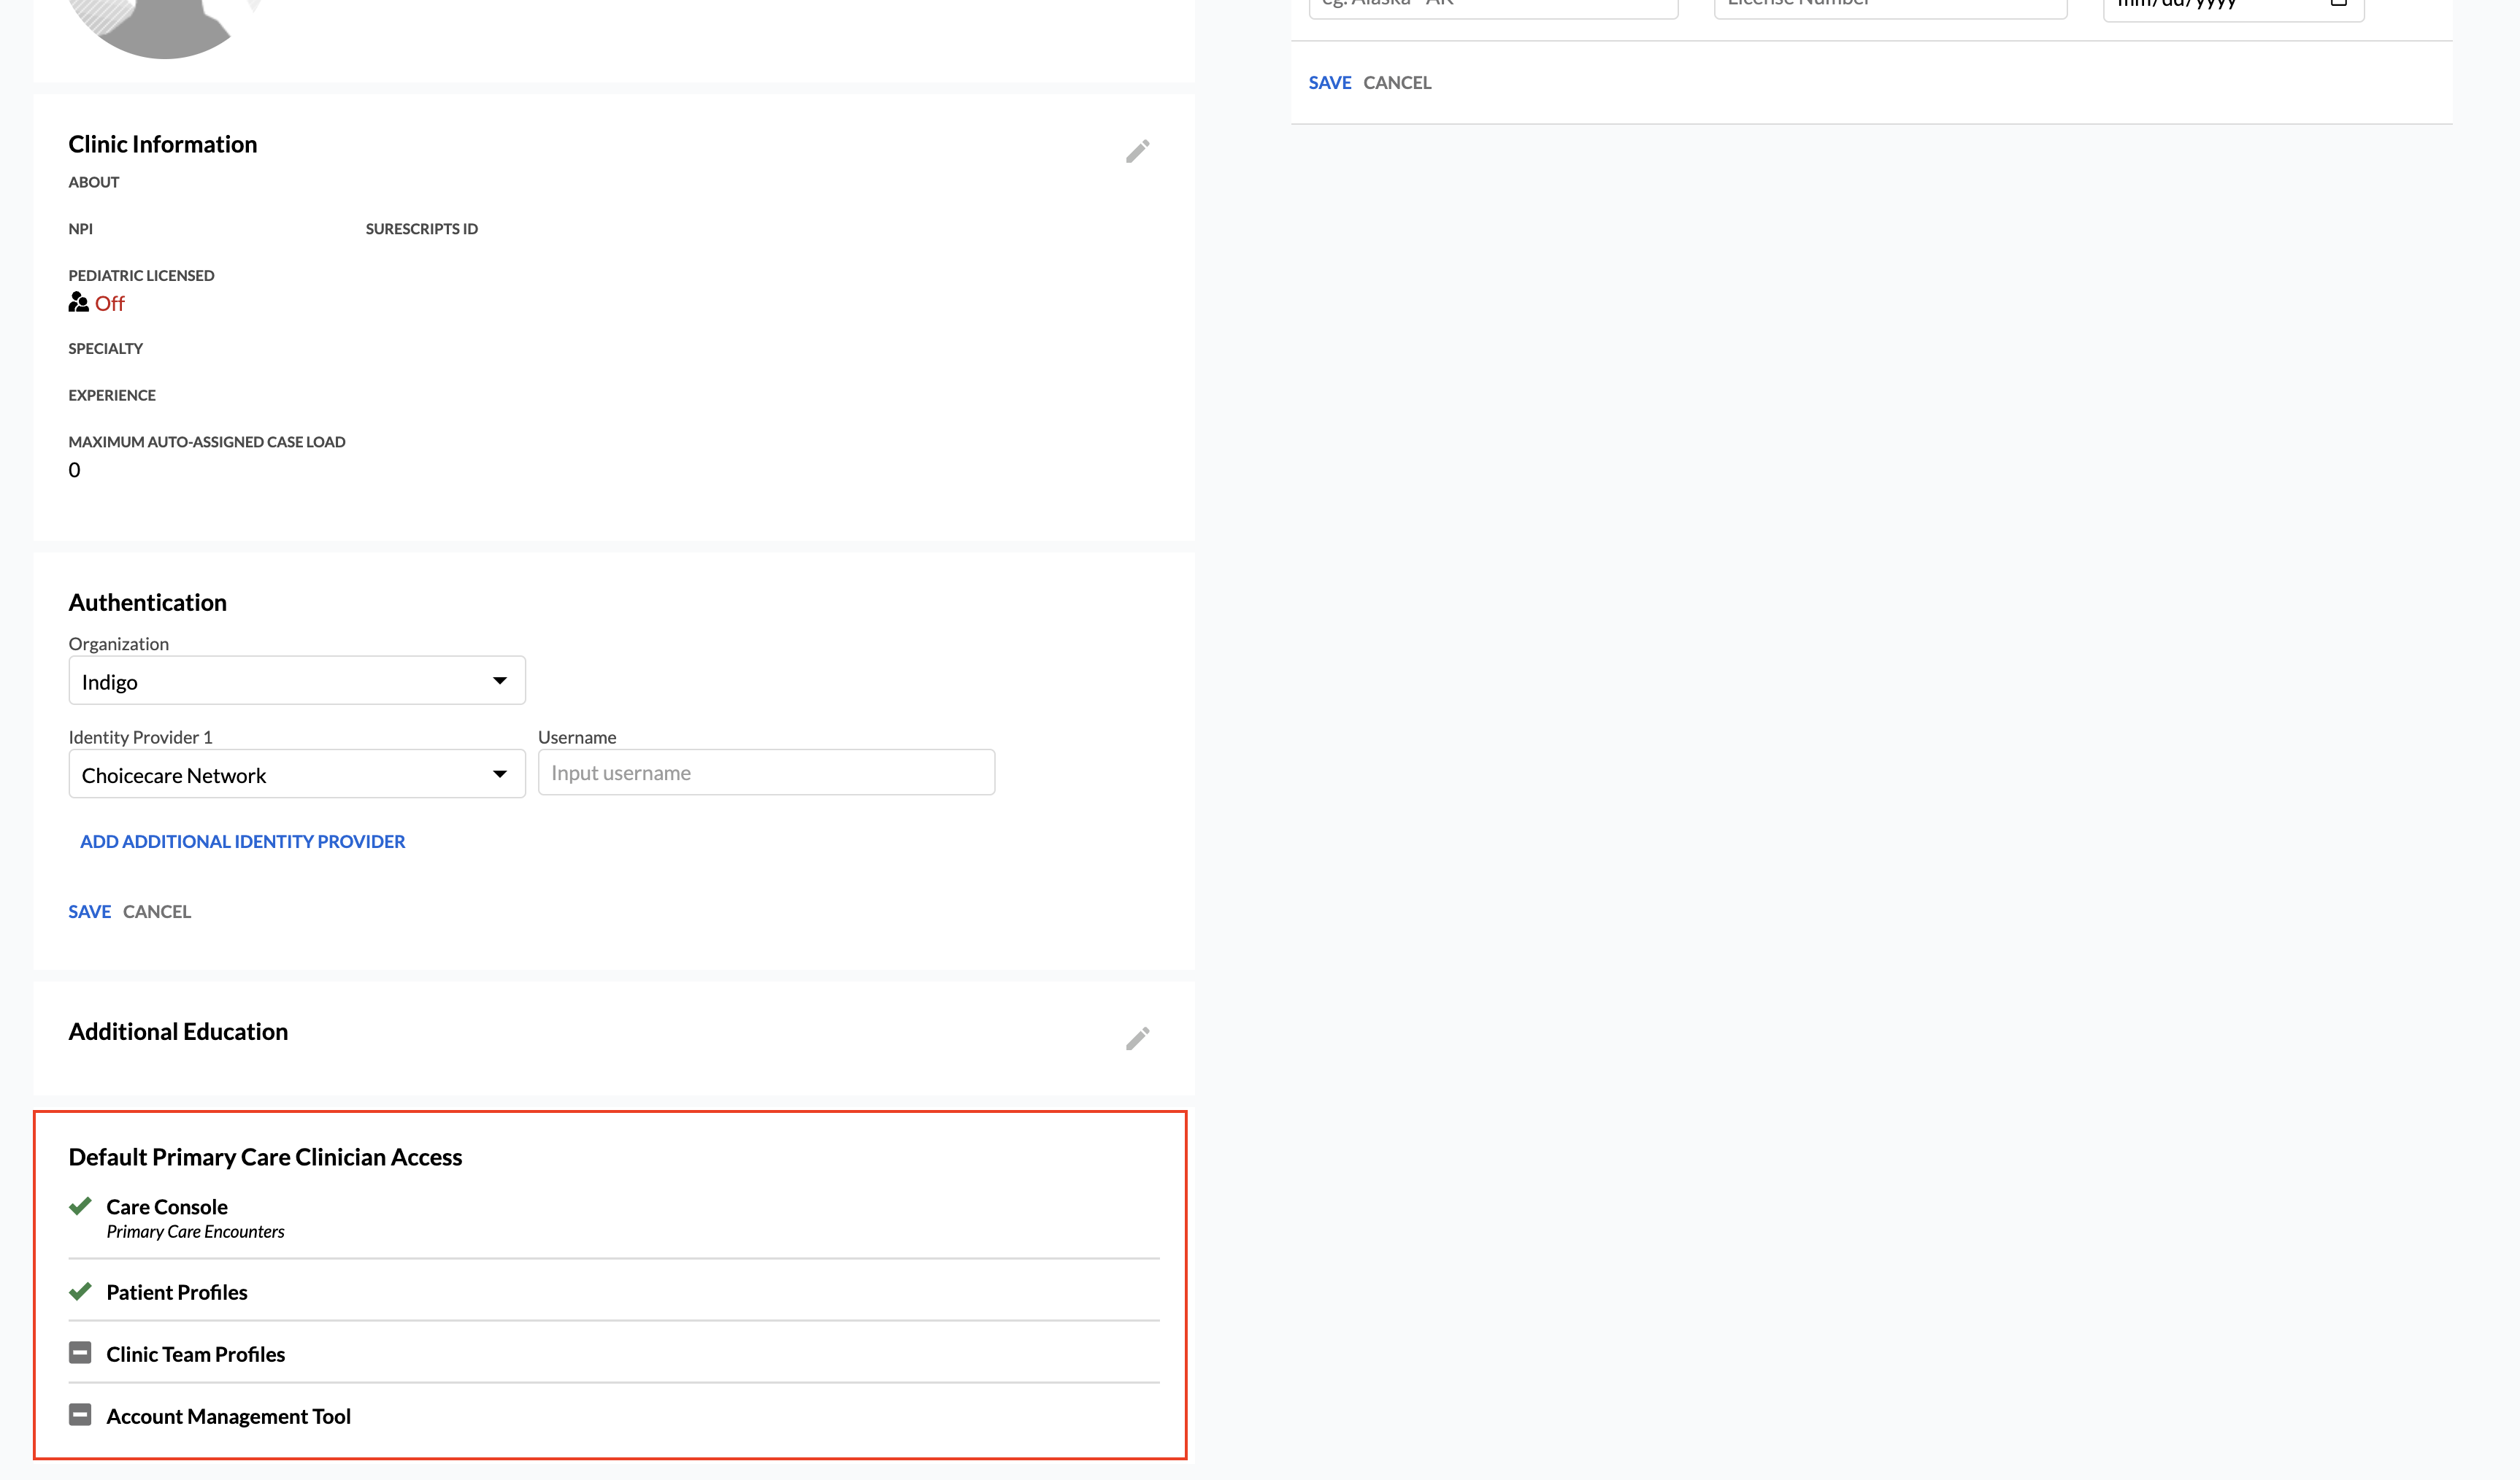
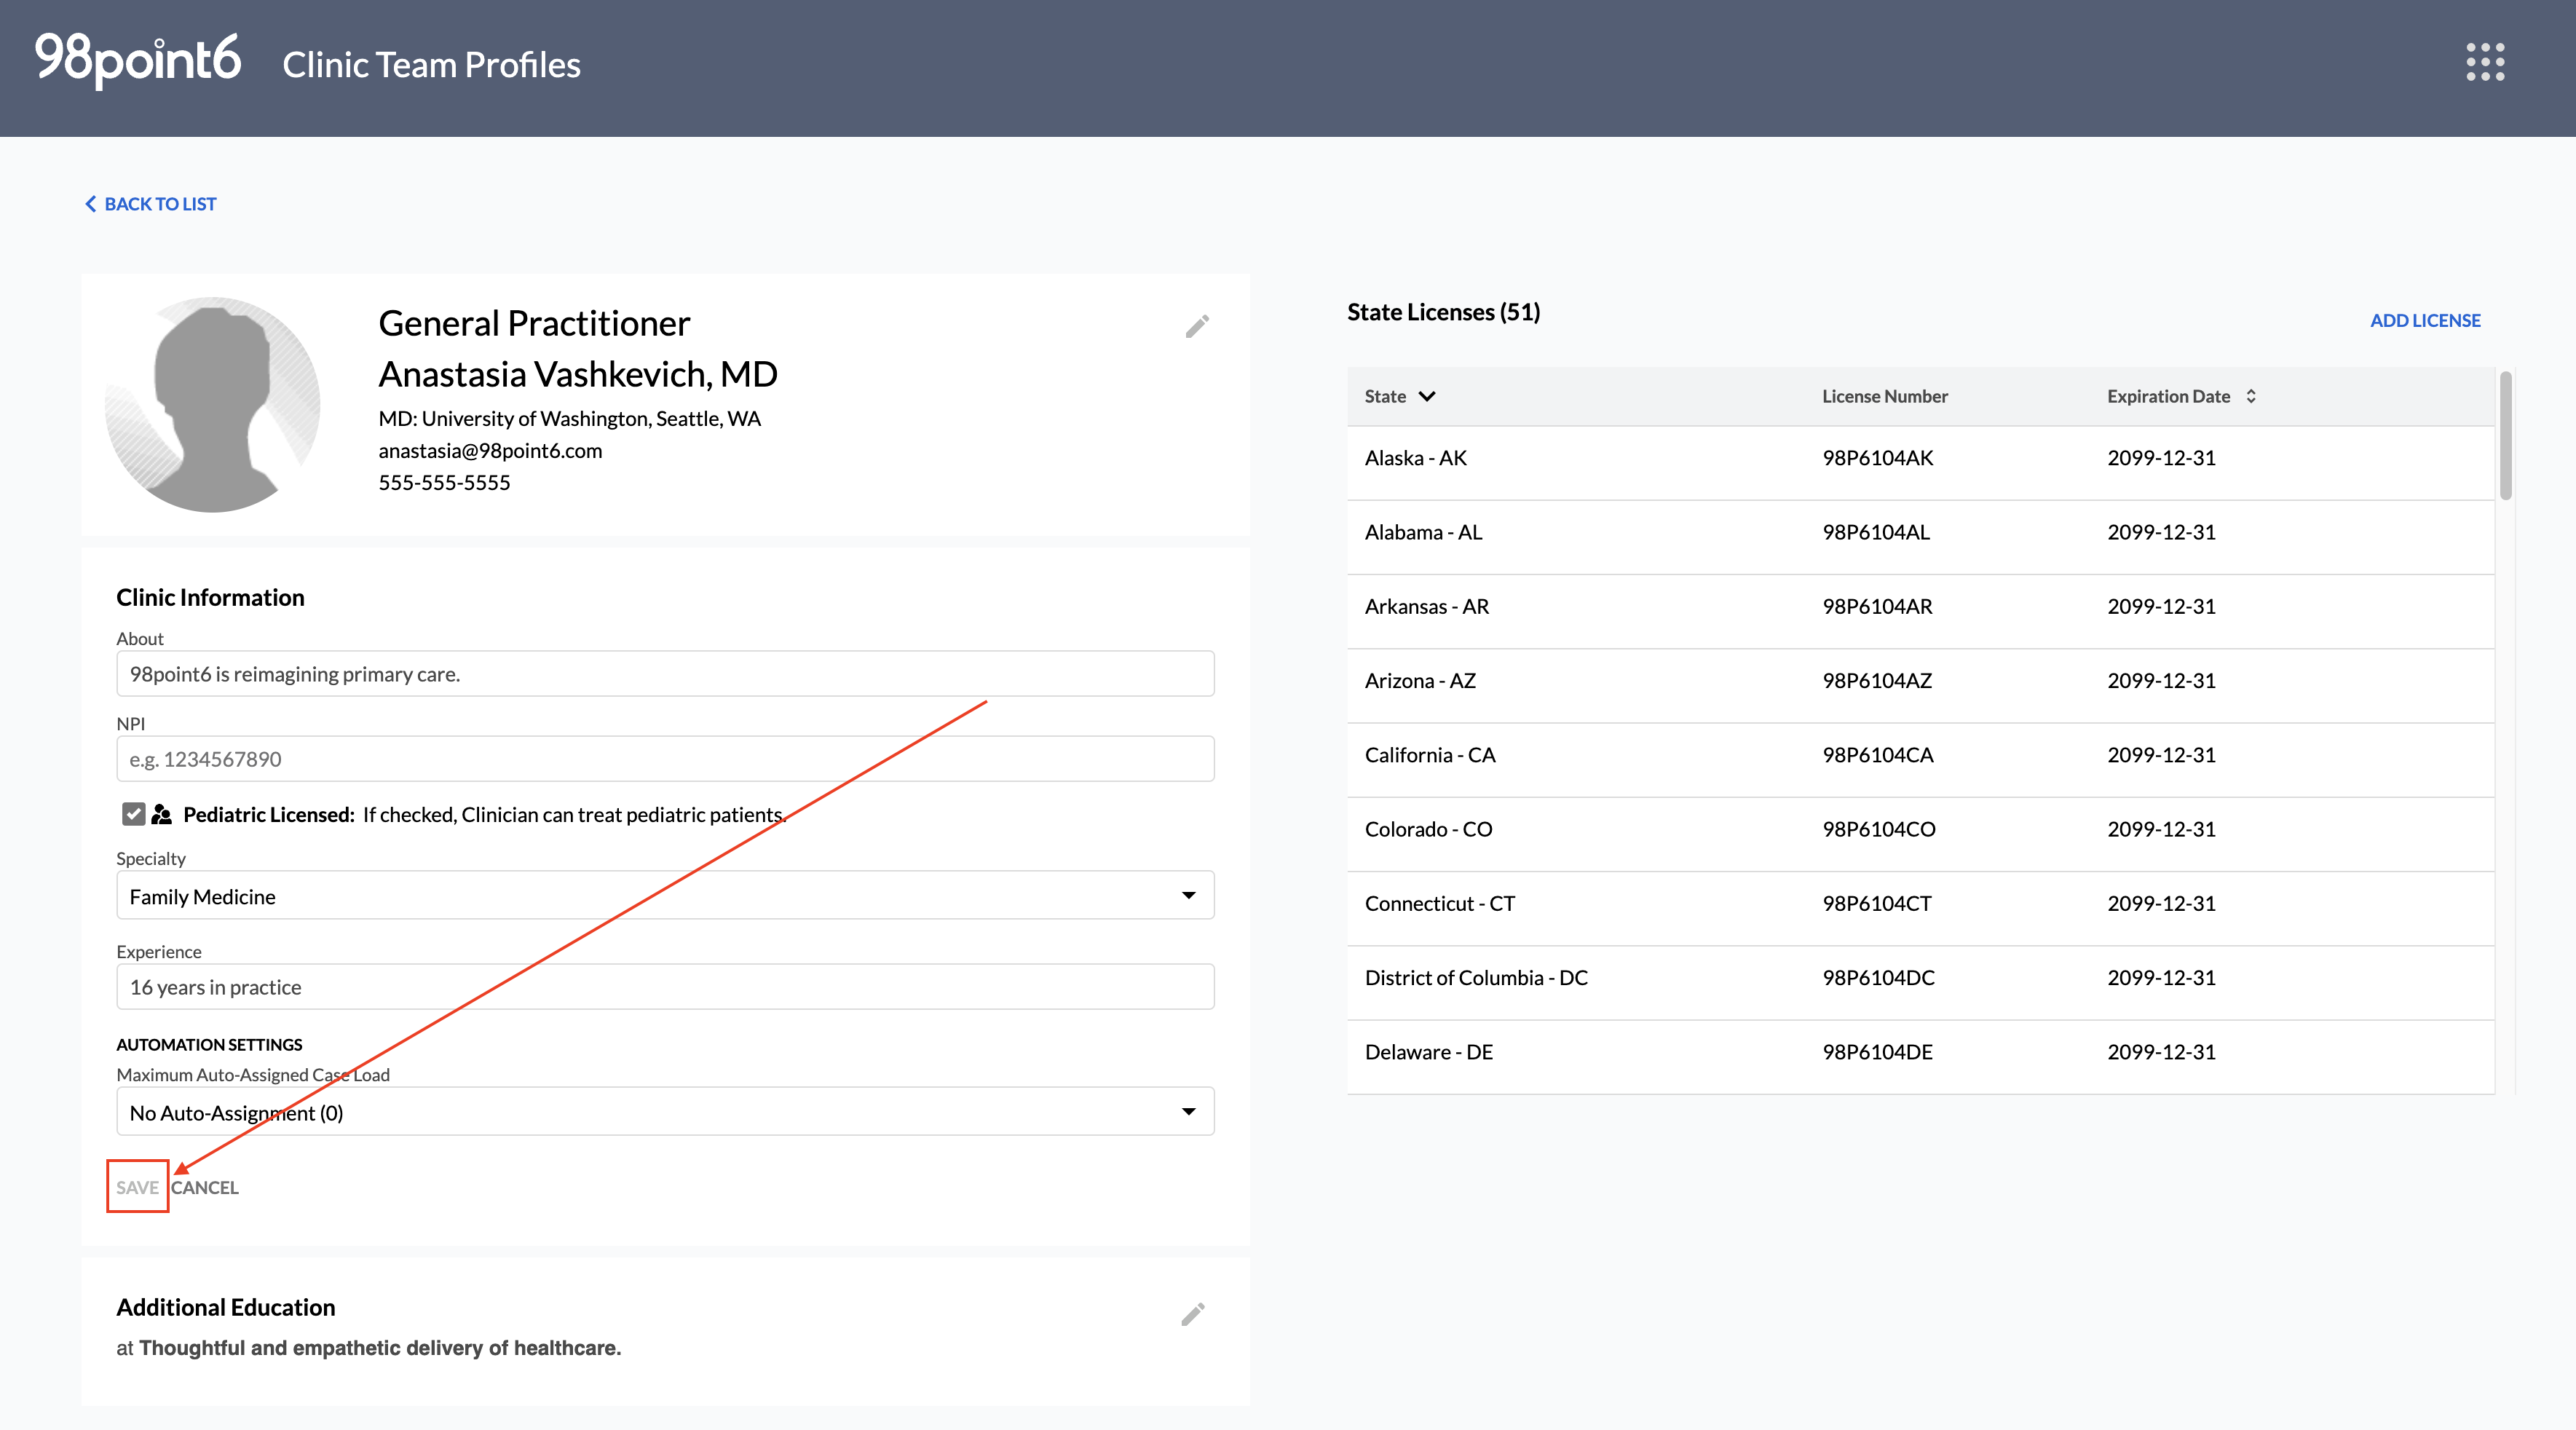
Select the pencil icon within the Clinic Information section to open, and then enter information into the About, NPI, and Experience fields.
Click to select the Pediatric Licensed checkbox if the clinician is licensed to treat pediatric patients.
Click to select the Training Group checkbox if the clinician is to be prioritized for auto case assignments.
Use the Speciality drop-down menu to select the speciality of the clinician.
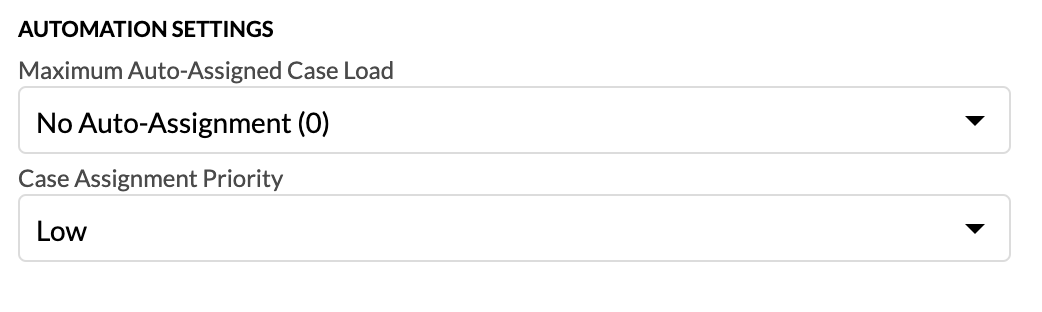
Use the Maximum Auto-Assigned Case Load drop-down menu to select the maximum auto-assigned caseload. This setting automatically defaults to 0 if no selection is made. (Note that 3 is the maximum, while 0 disables the auto-assignment feature.)
Use the Case Assignment Priority drop-down menu to select the priority that should be assigned to the specific clinician. (Very Low is the default setting.)
Select Save.
The Surescripts ID field does not automatically populate when the Clinic Information section is updated and saved. Clinicians will not be able to e-prescribe medications within the Console until this ID displays, usually within 24 to 48 hours. As a result, newly added clinicians in your organization may not have immediate access to prescribe within the Console but can still prescribe through the VHR.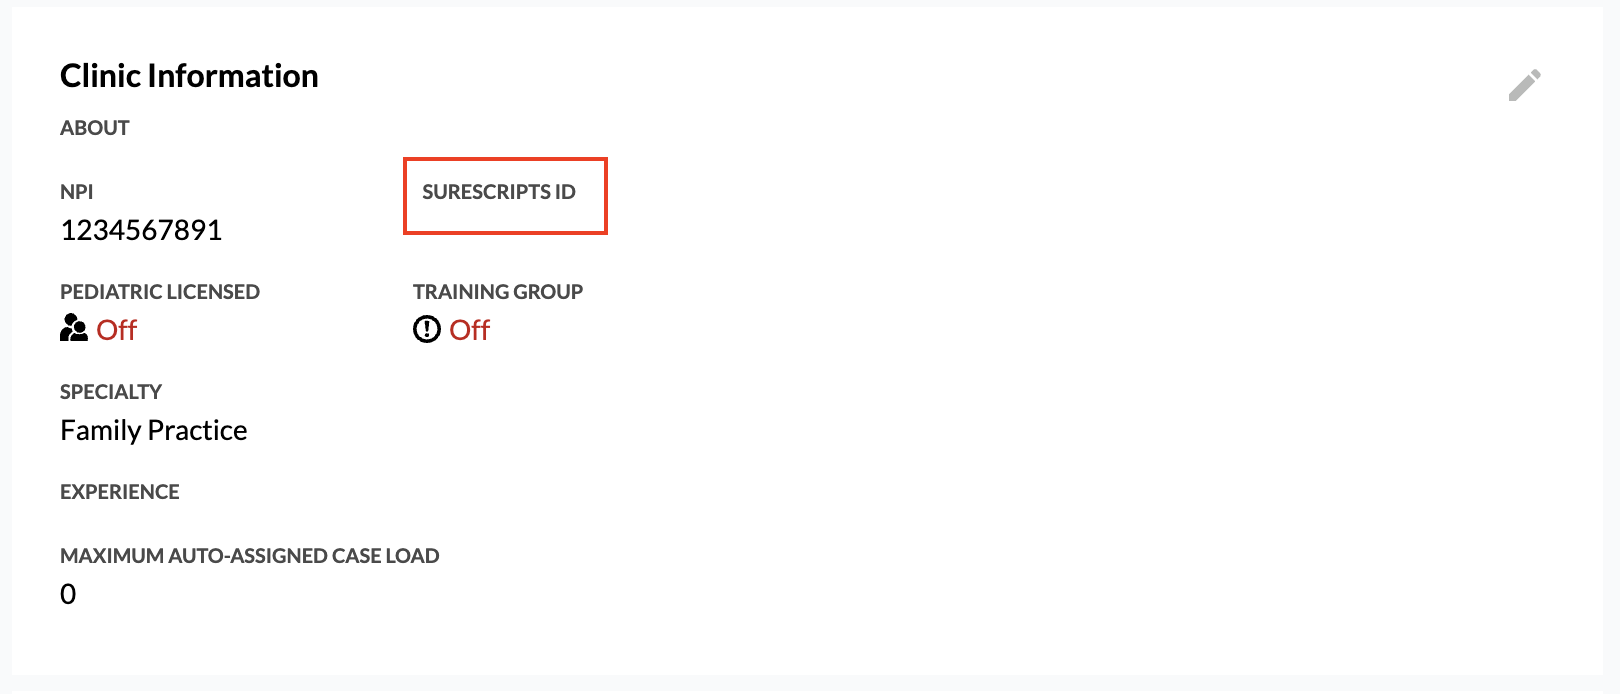
Select the pencil icon within the Authentication section (this section displays after you have saved the required Clinic Information), and then select your organization from the Organization drop-down menu.
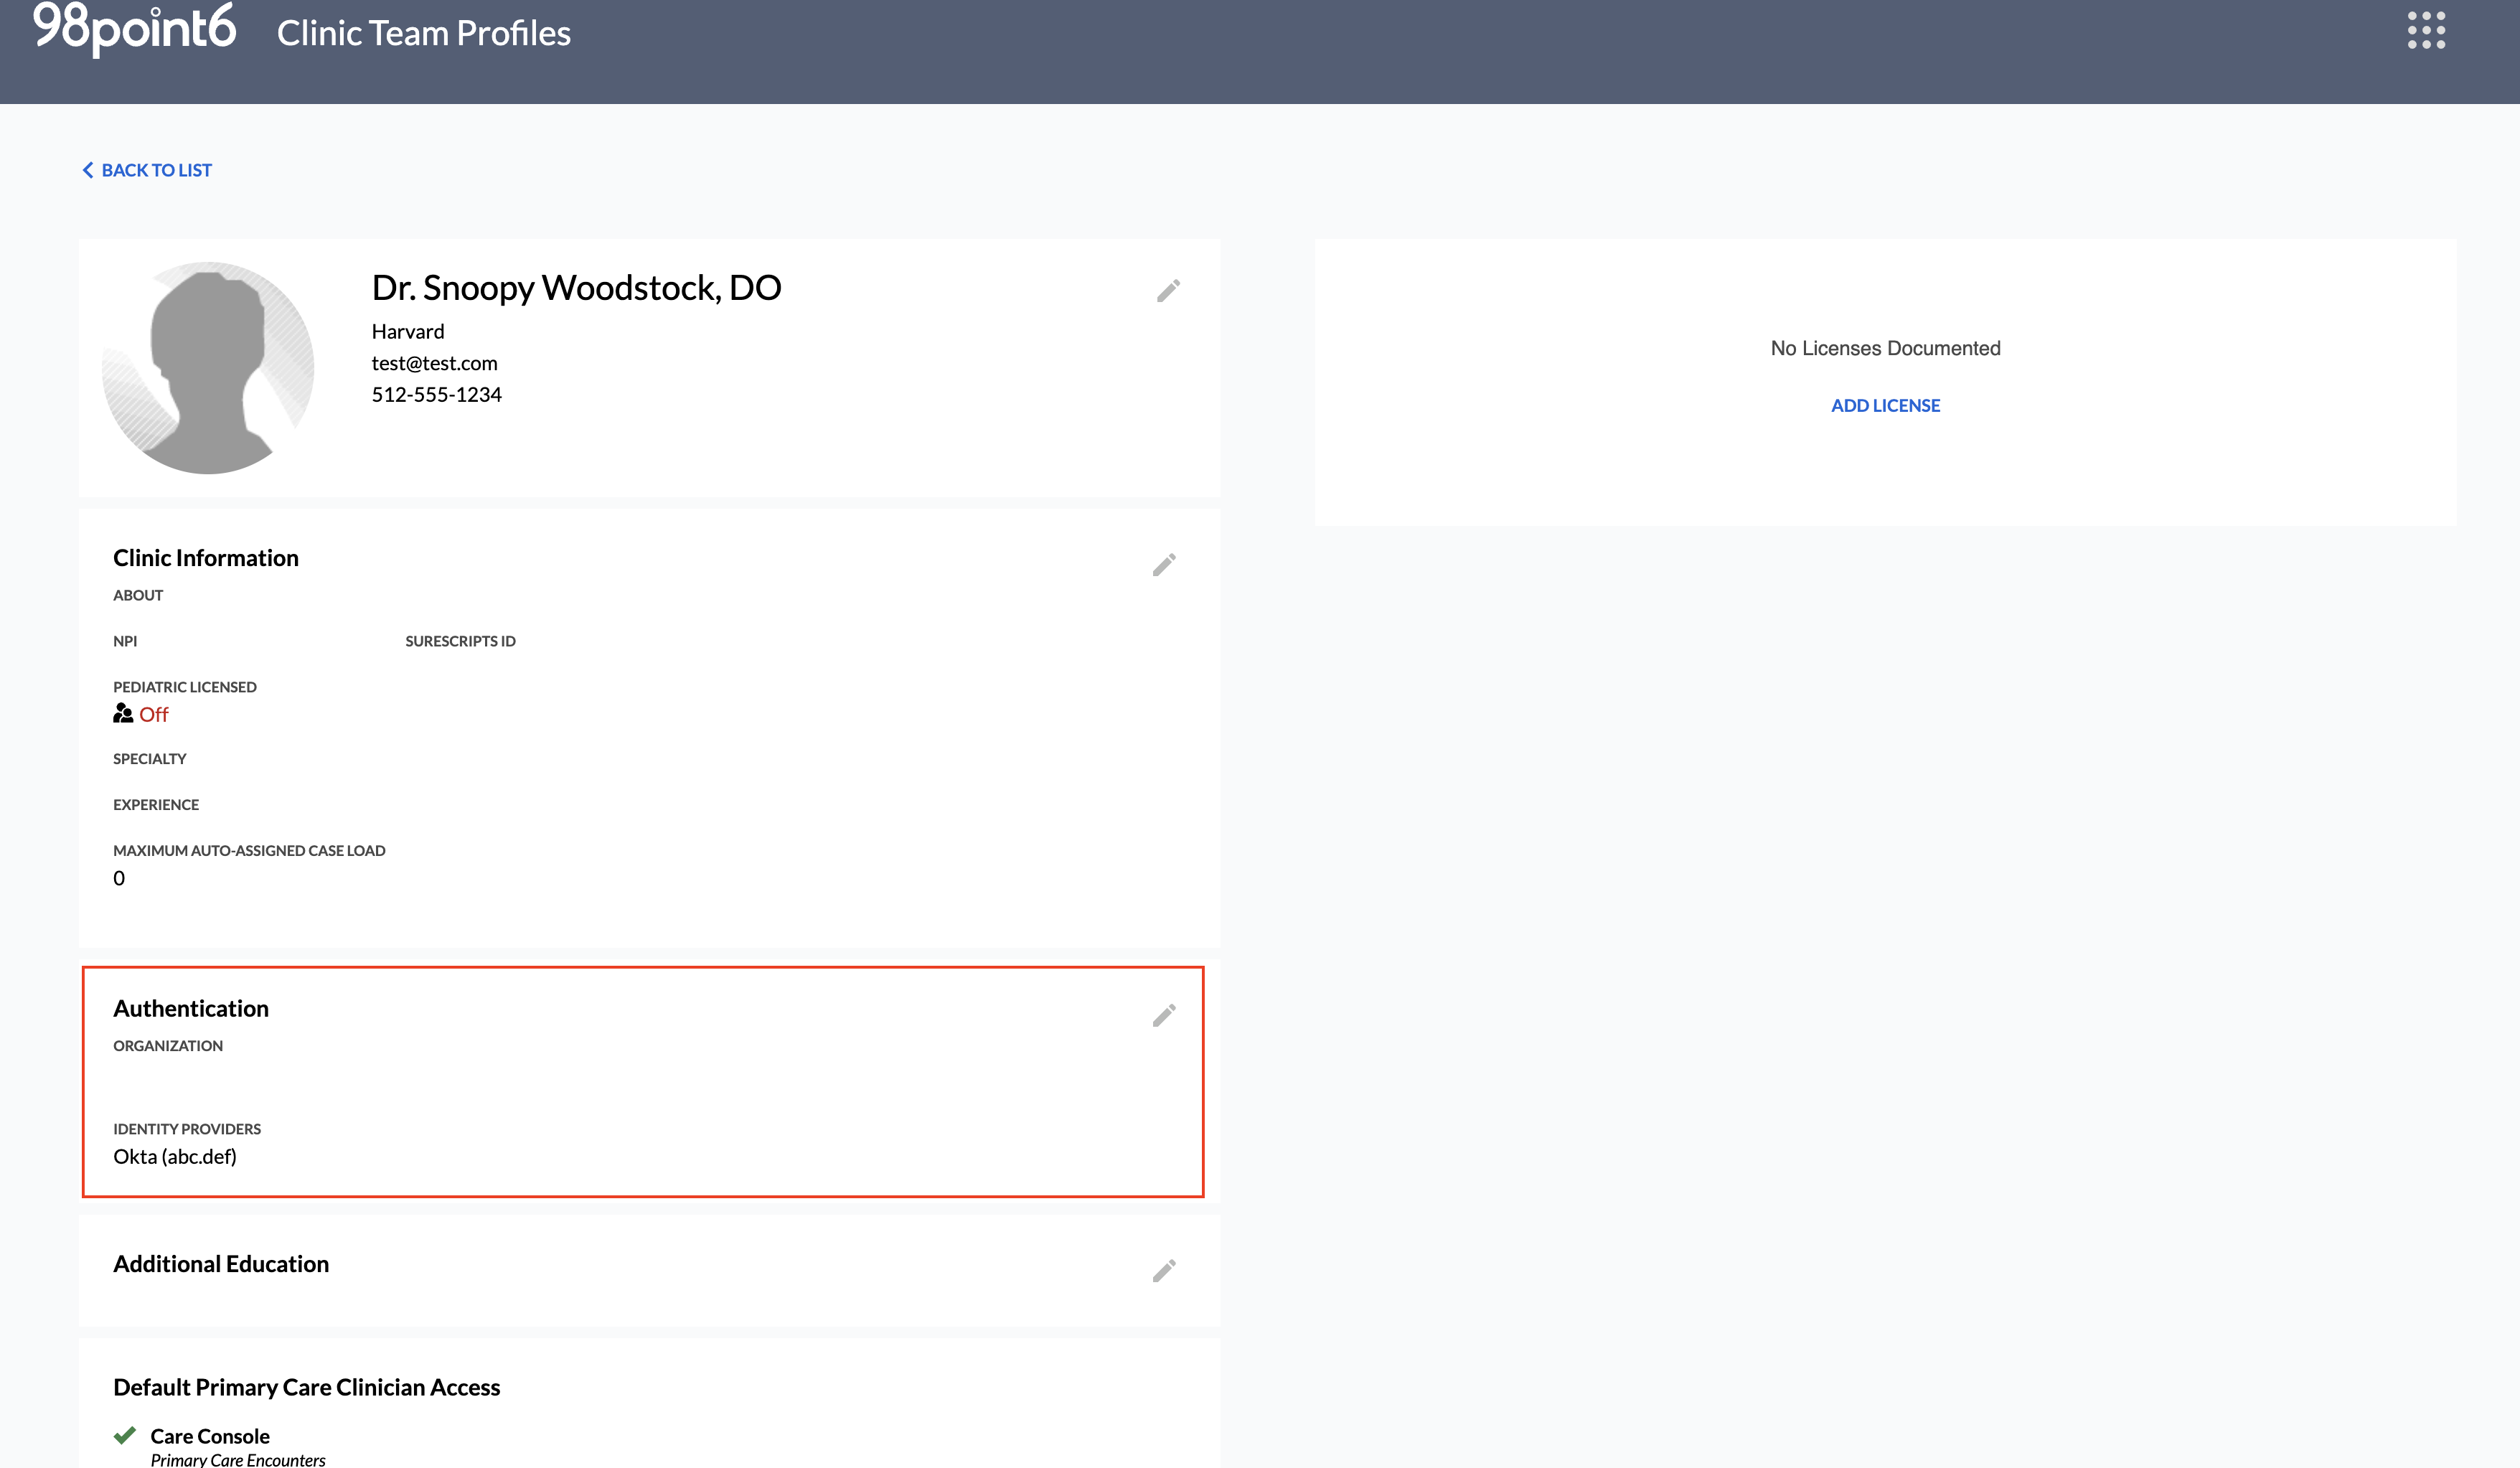
Select your provider from within the Identity Provider (idP) drop-down menu, and then enter the Username of the profile. If your organization uses multiple iDp providers, each of these providers and credentials can be selected and saved on the user record.
WARNING: The Username entered here must exactly match the user’s existing IdP username (ie, capitalization, etc.) IdP user names are case-sensitive and must match exactly. Authentication will fail if this is not entered correctly. We recommend that you work with organization’s IT department, and validate each individual username.
NOTE: The system supports multiple IdP providers on one user record however, they must be part of the same organization. If a user belongs to different organizations (companies), a separate user record must be created for the user in each organization, with their respective IdP providers configured.
Click the Add Additional Identity Provider link to add any additional providers, and then click Save.
Select the pencil icon within the Additional Education section, select Add, and then Save to add any additional education.
Review the Default Primary Care Clinician Access section to review permissions assigned to this role.
Select Add License to add the appropriate clinician licensure information, and then select Save. (Repeat to add any additional license information.)
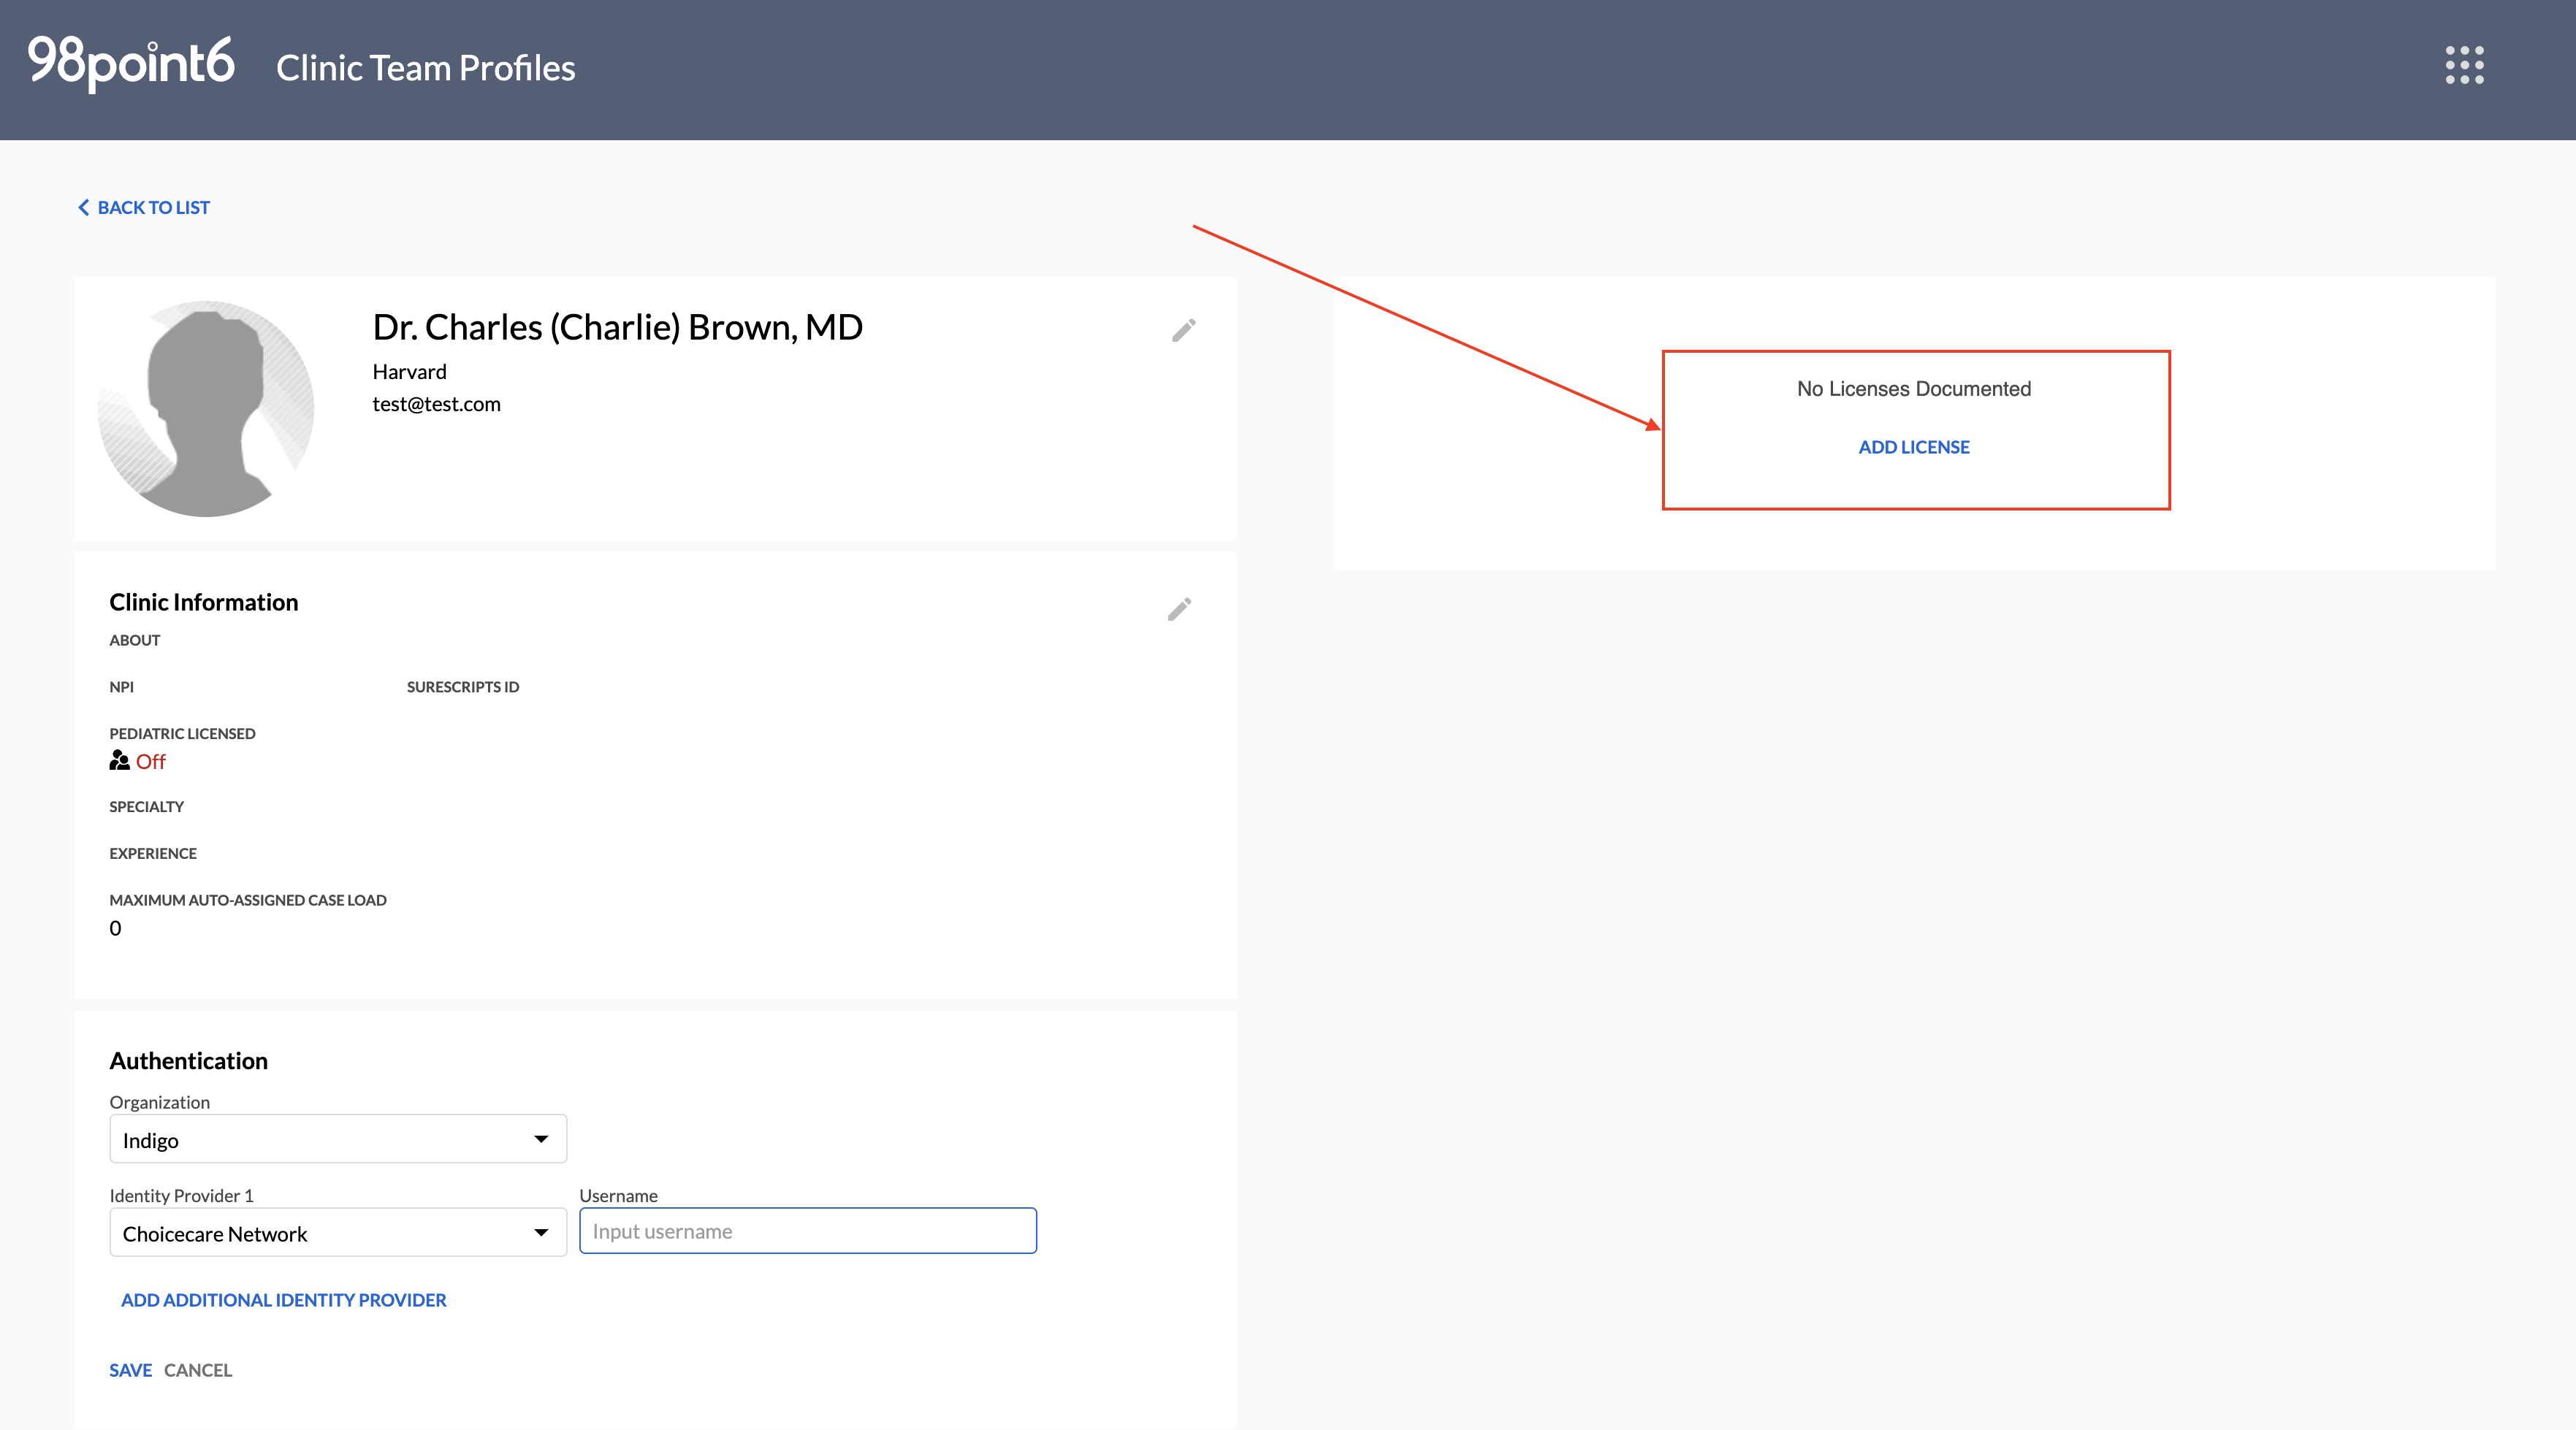
NOTE: Behavioral Health clinician licensing information is not validated by the system. As a result, there is no need to update Behavioral Health clinician user profiles with licensing information.
Edit a Profile
To edit a Primary Care Clinician profile:
From the Clinic Team Profiles dashboard, search for the name or NPI number of the profile you wish to edit (see Clinic Team Profiles Tool for more information on how to search).
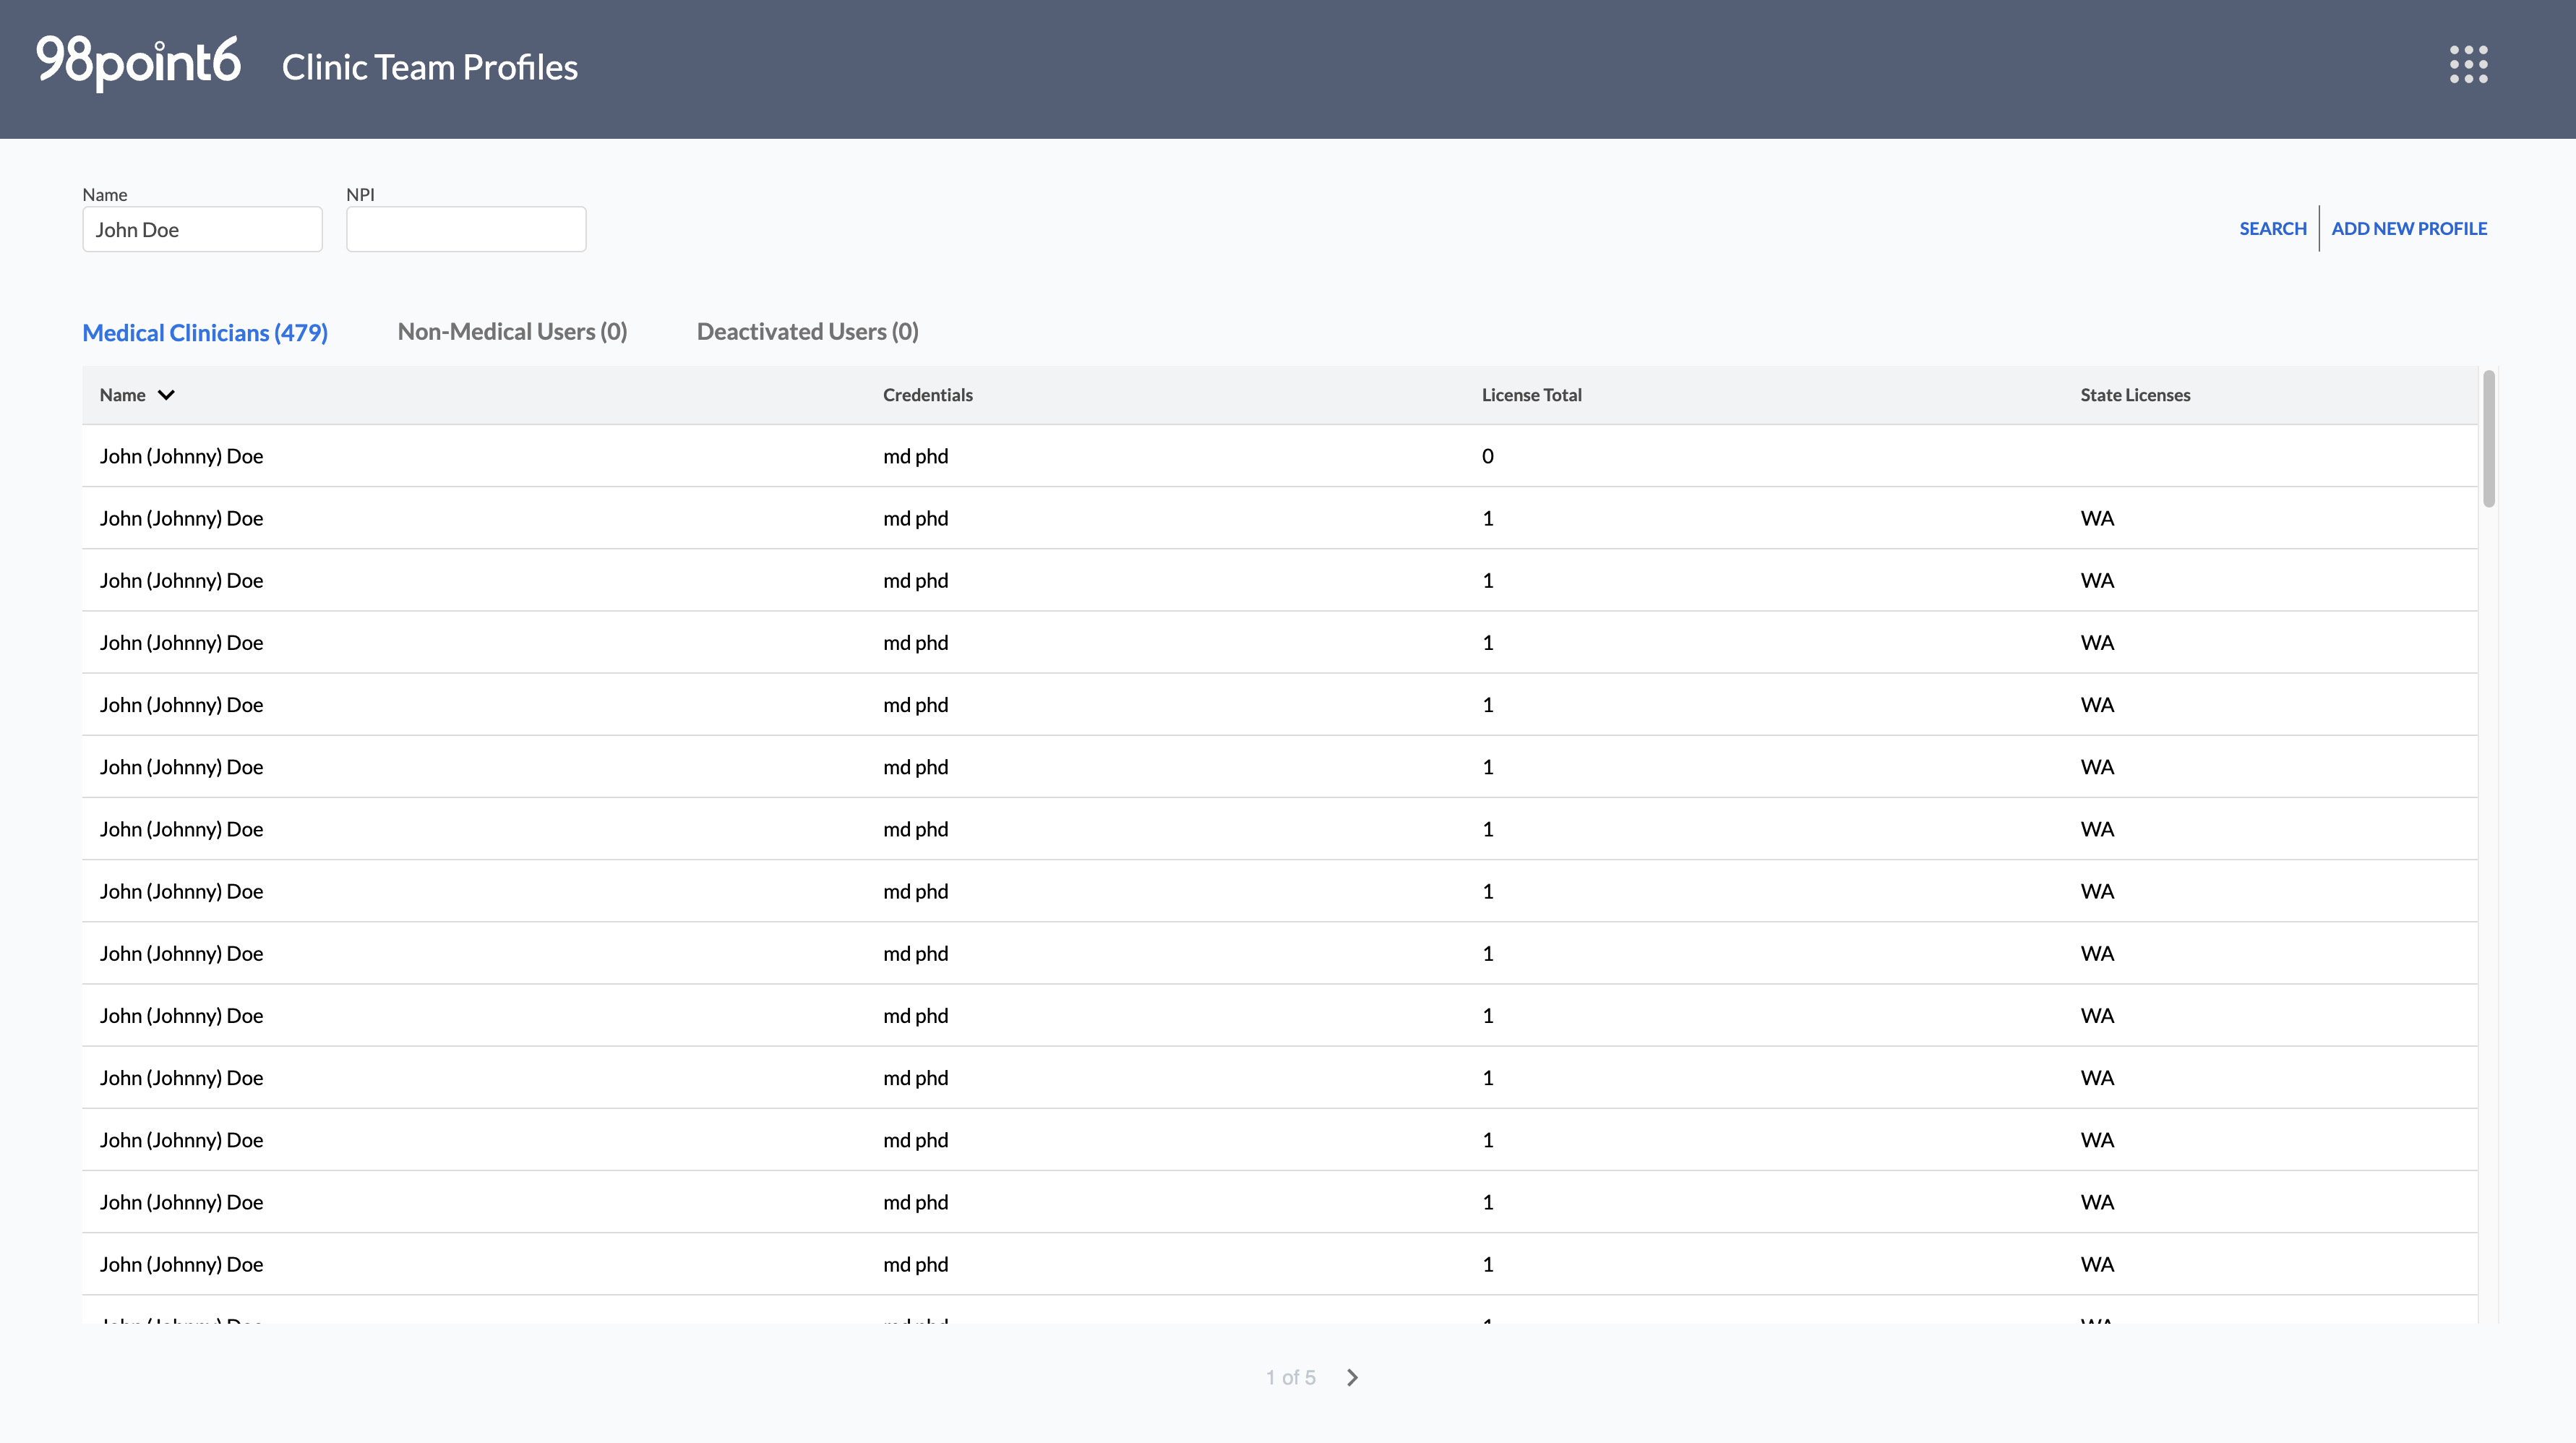
NOTE: Primary care clinicians are listed within the Medical Clinicians tab.
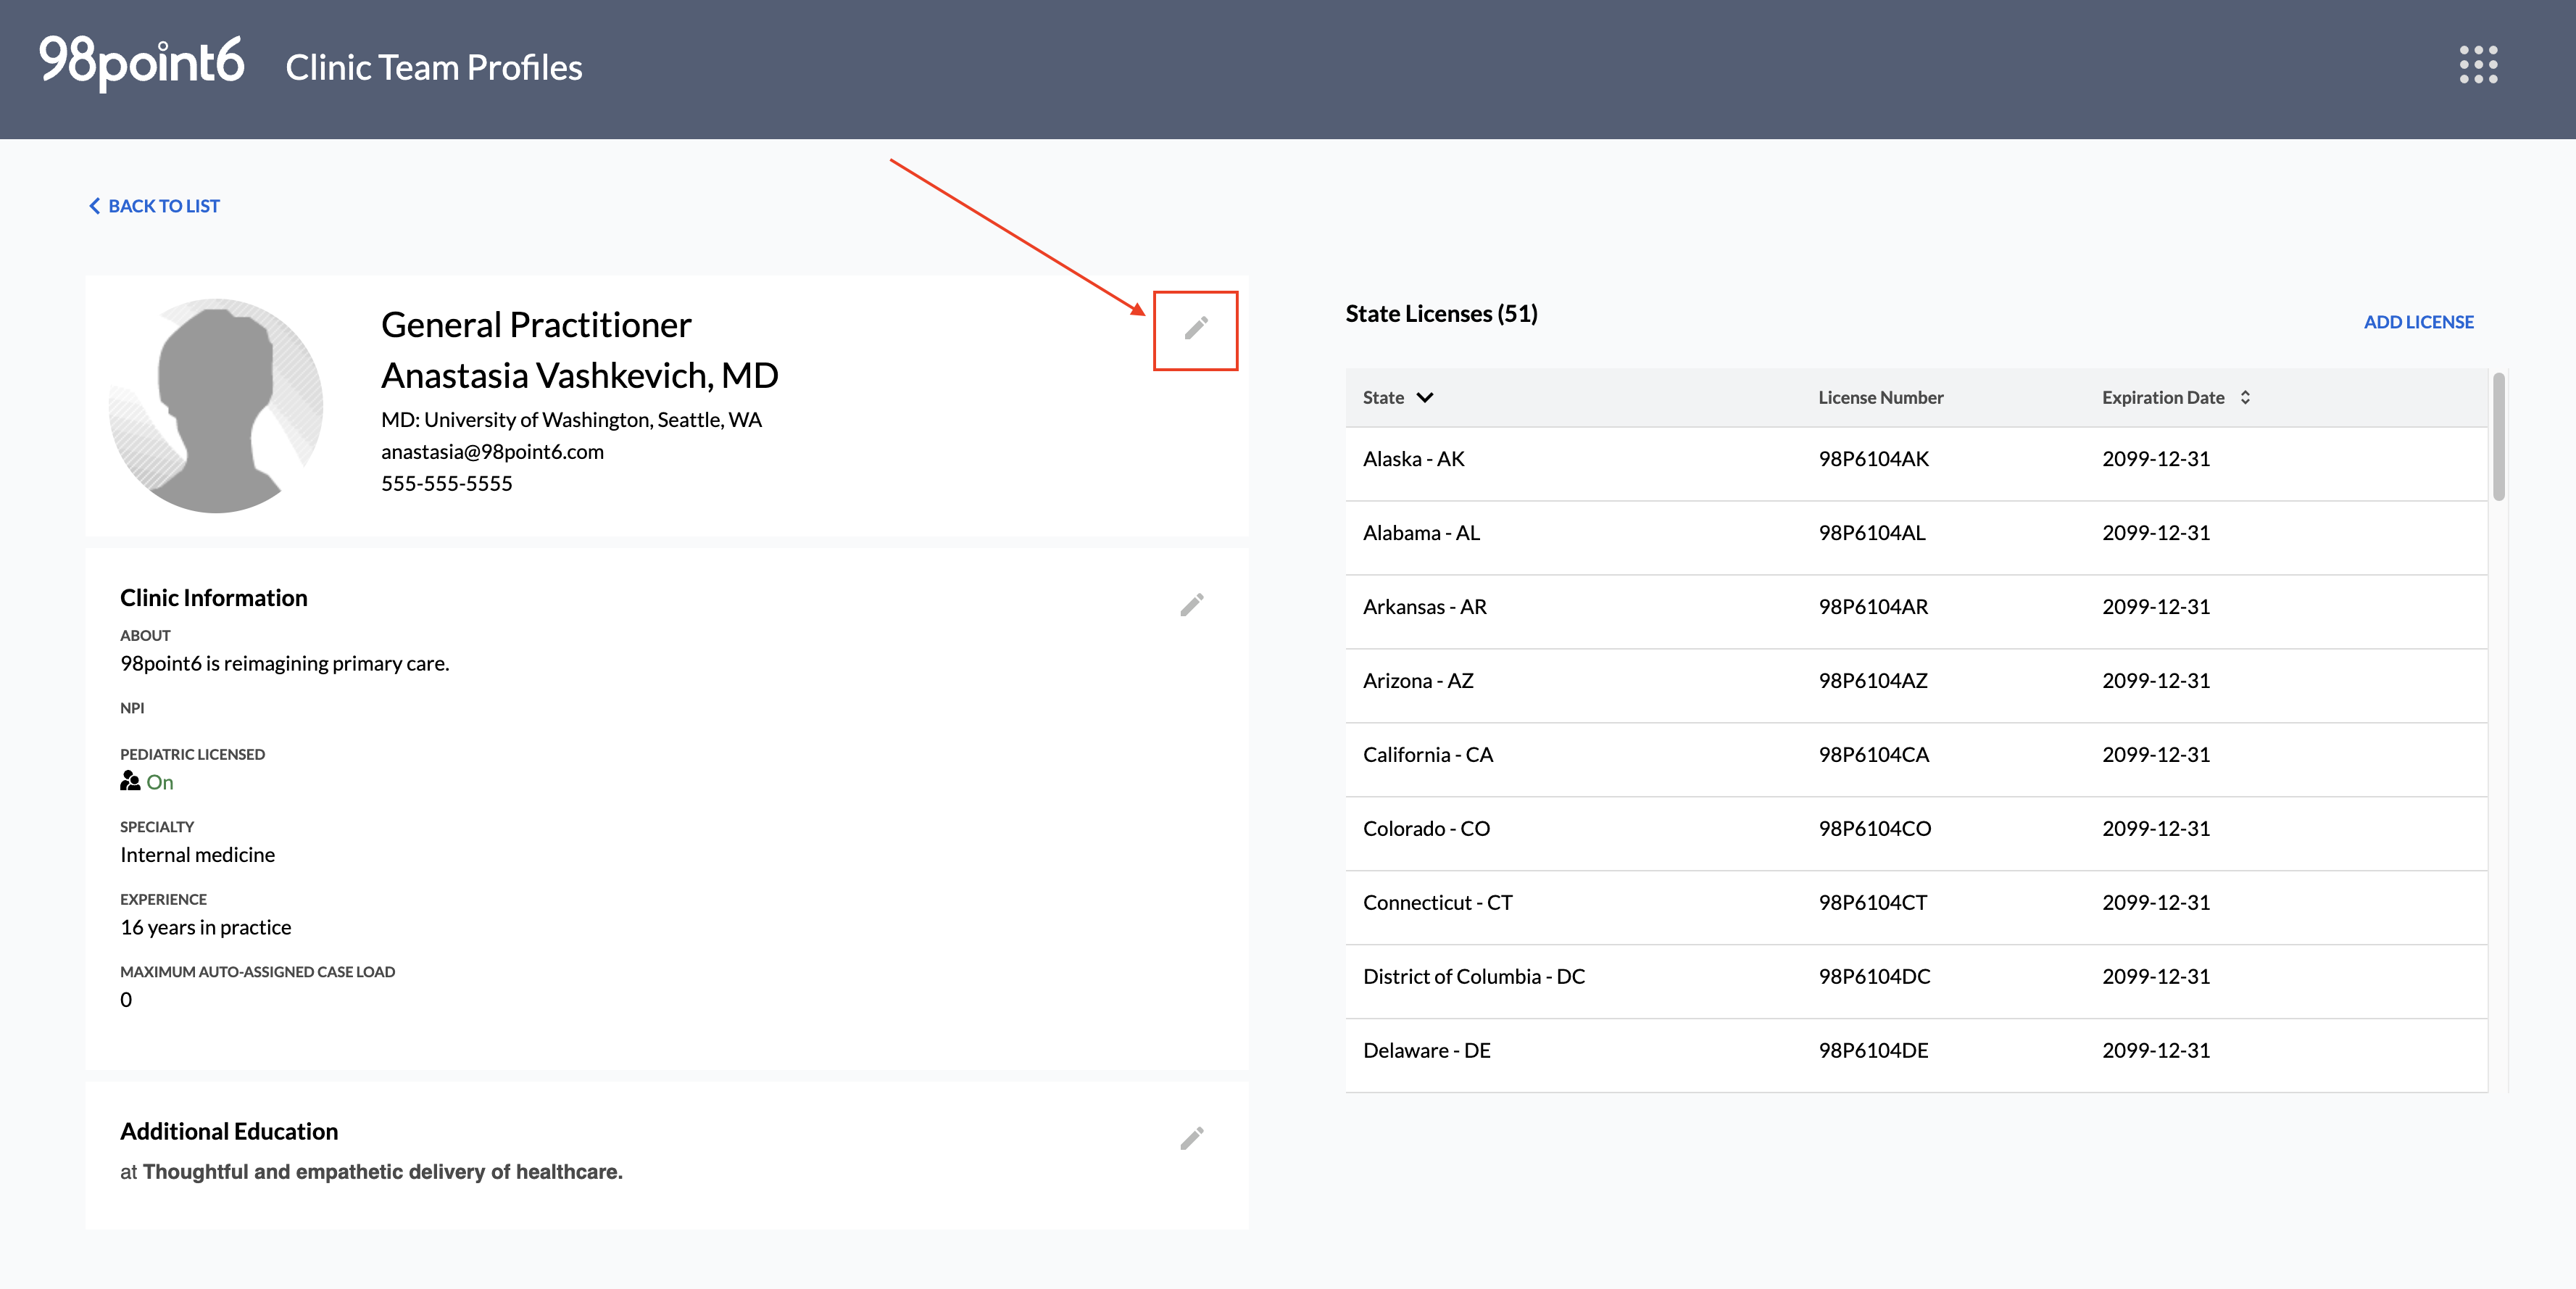
Click to select the name of the profile you wish to edit, and then select the pencil icon to make changes within a specific section.
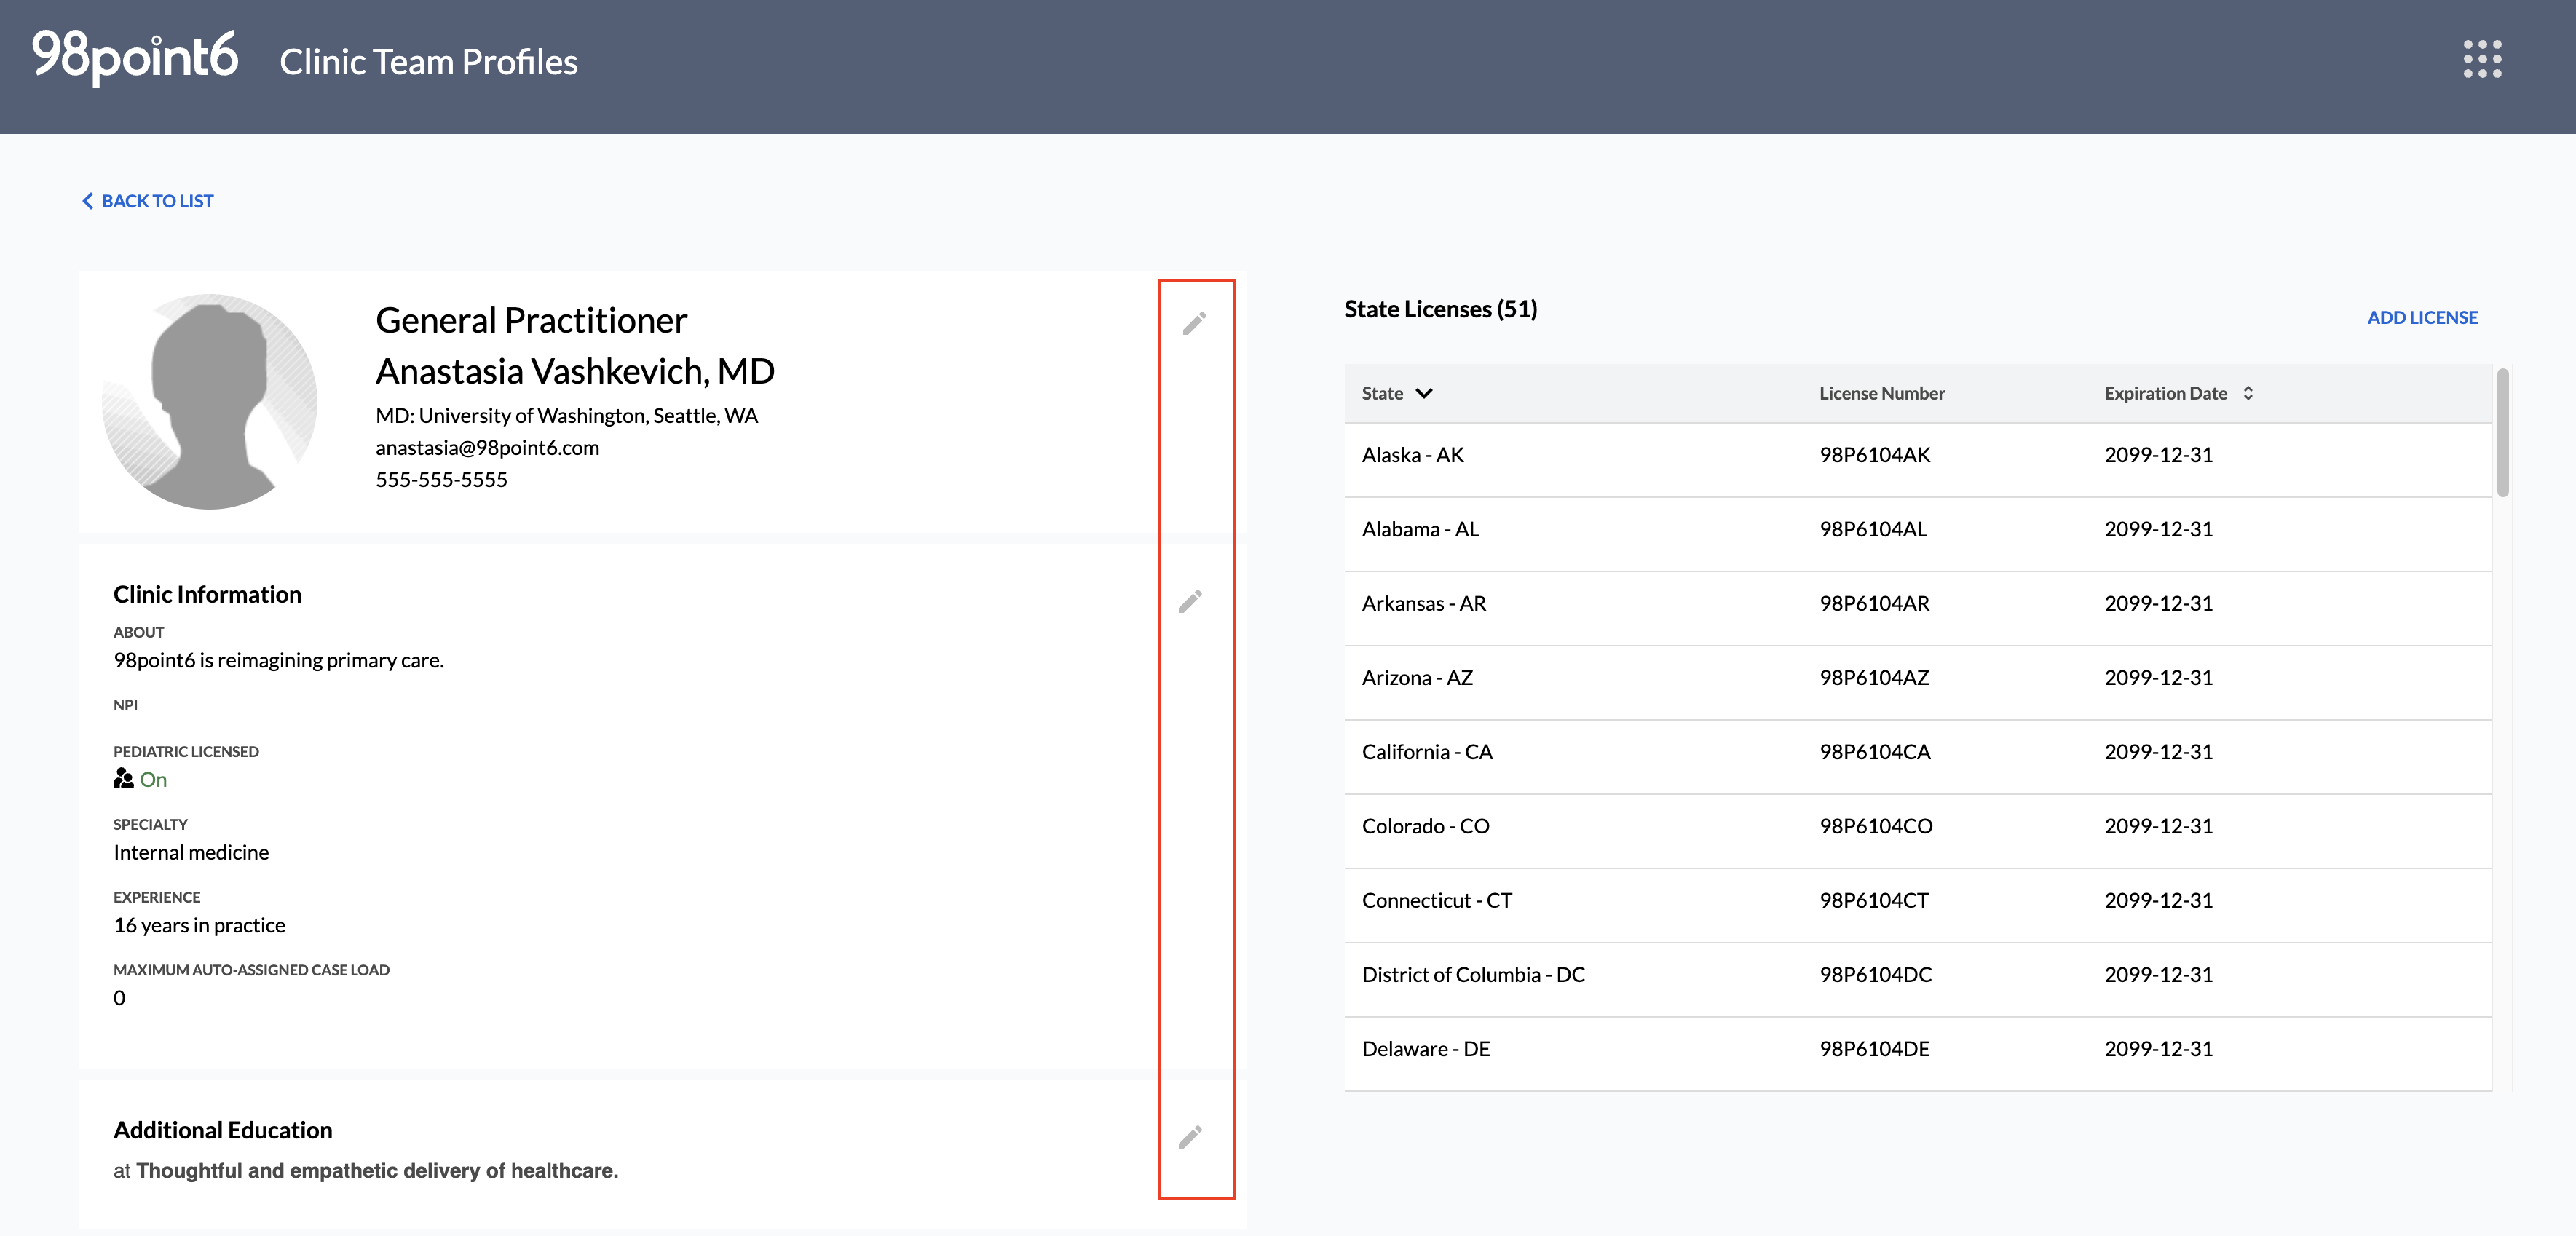
Make any necessary changes, and then select Save.
Deactivate a Profile
To deactivate a Primary Care Clinician profile:
NOTE: Deactivation does not delete the profile.
From the Clinic Team Profiles dashboard, search for the name or NPI number of the profile you wish to edit (see Clinic Team Profiles Tool for more information on how to search).
NOTE: Primary care clinicians are listed within the Medical Clinicians tab.
Click to select the name of the profile you wish to deactivate, and then select the pencil icon to make changes within the first section that displays the name, education, and contact information.
Select Deactivate.
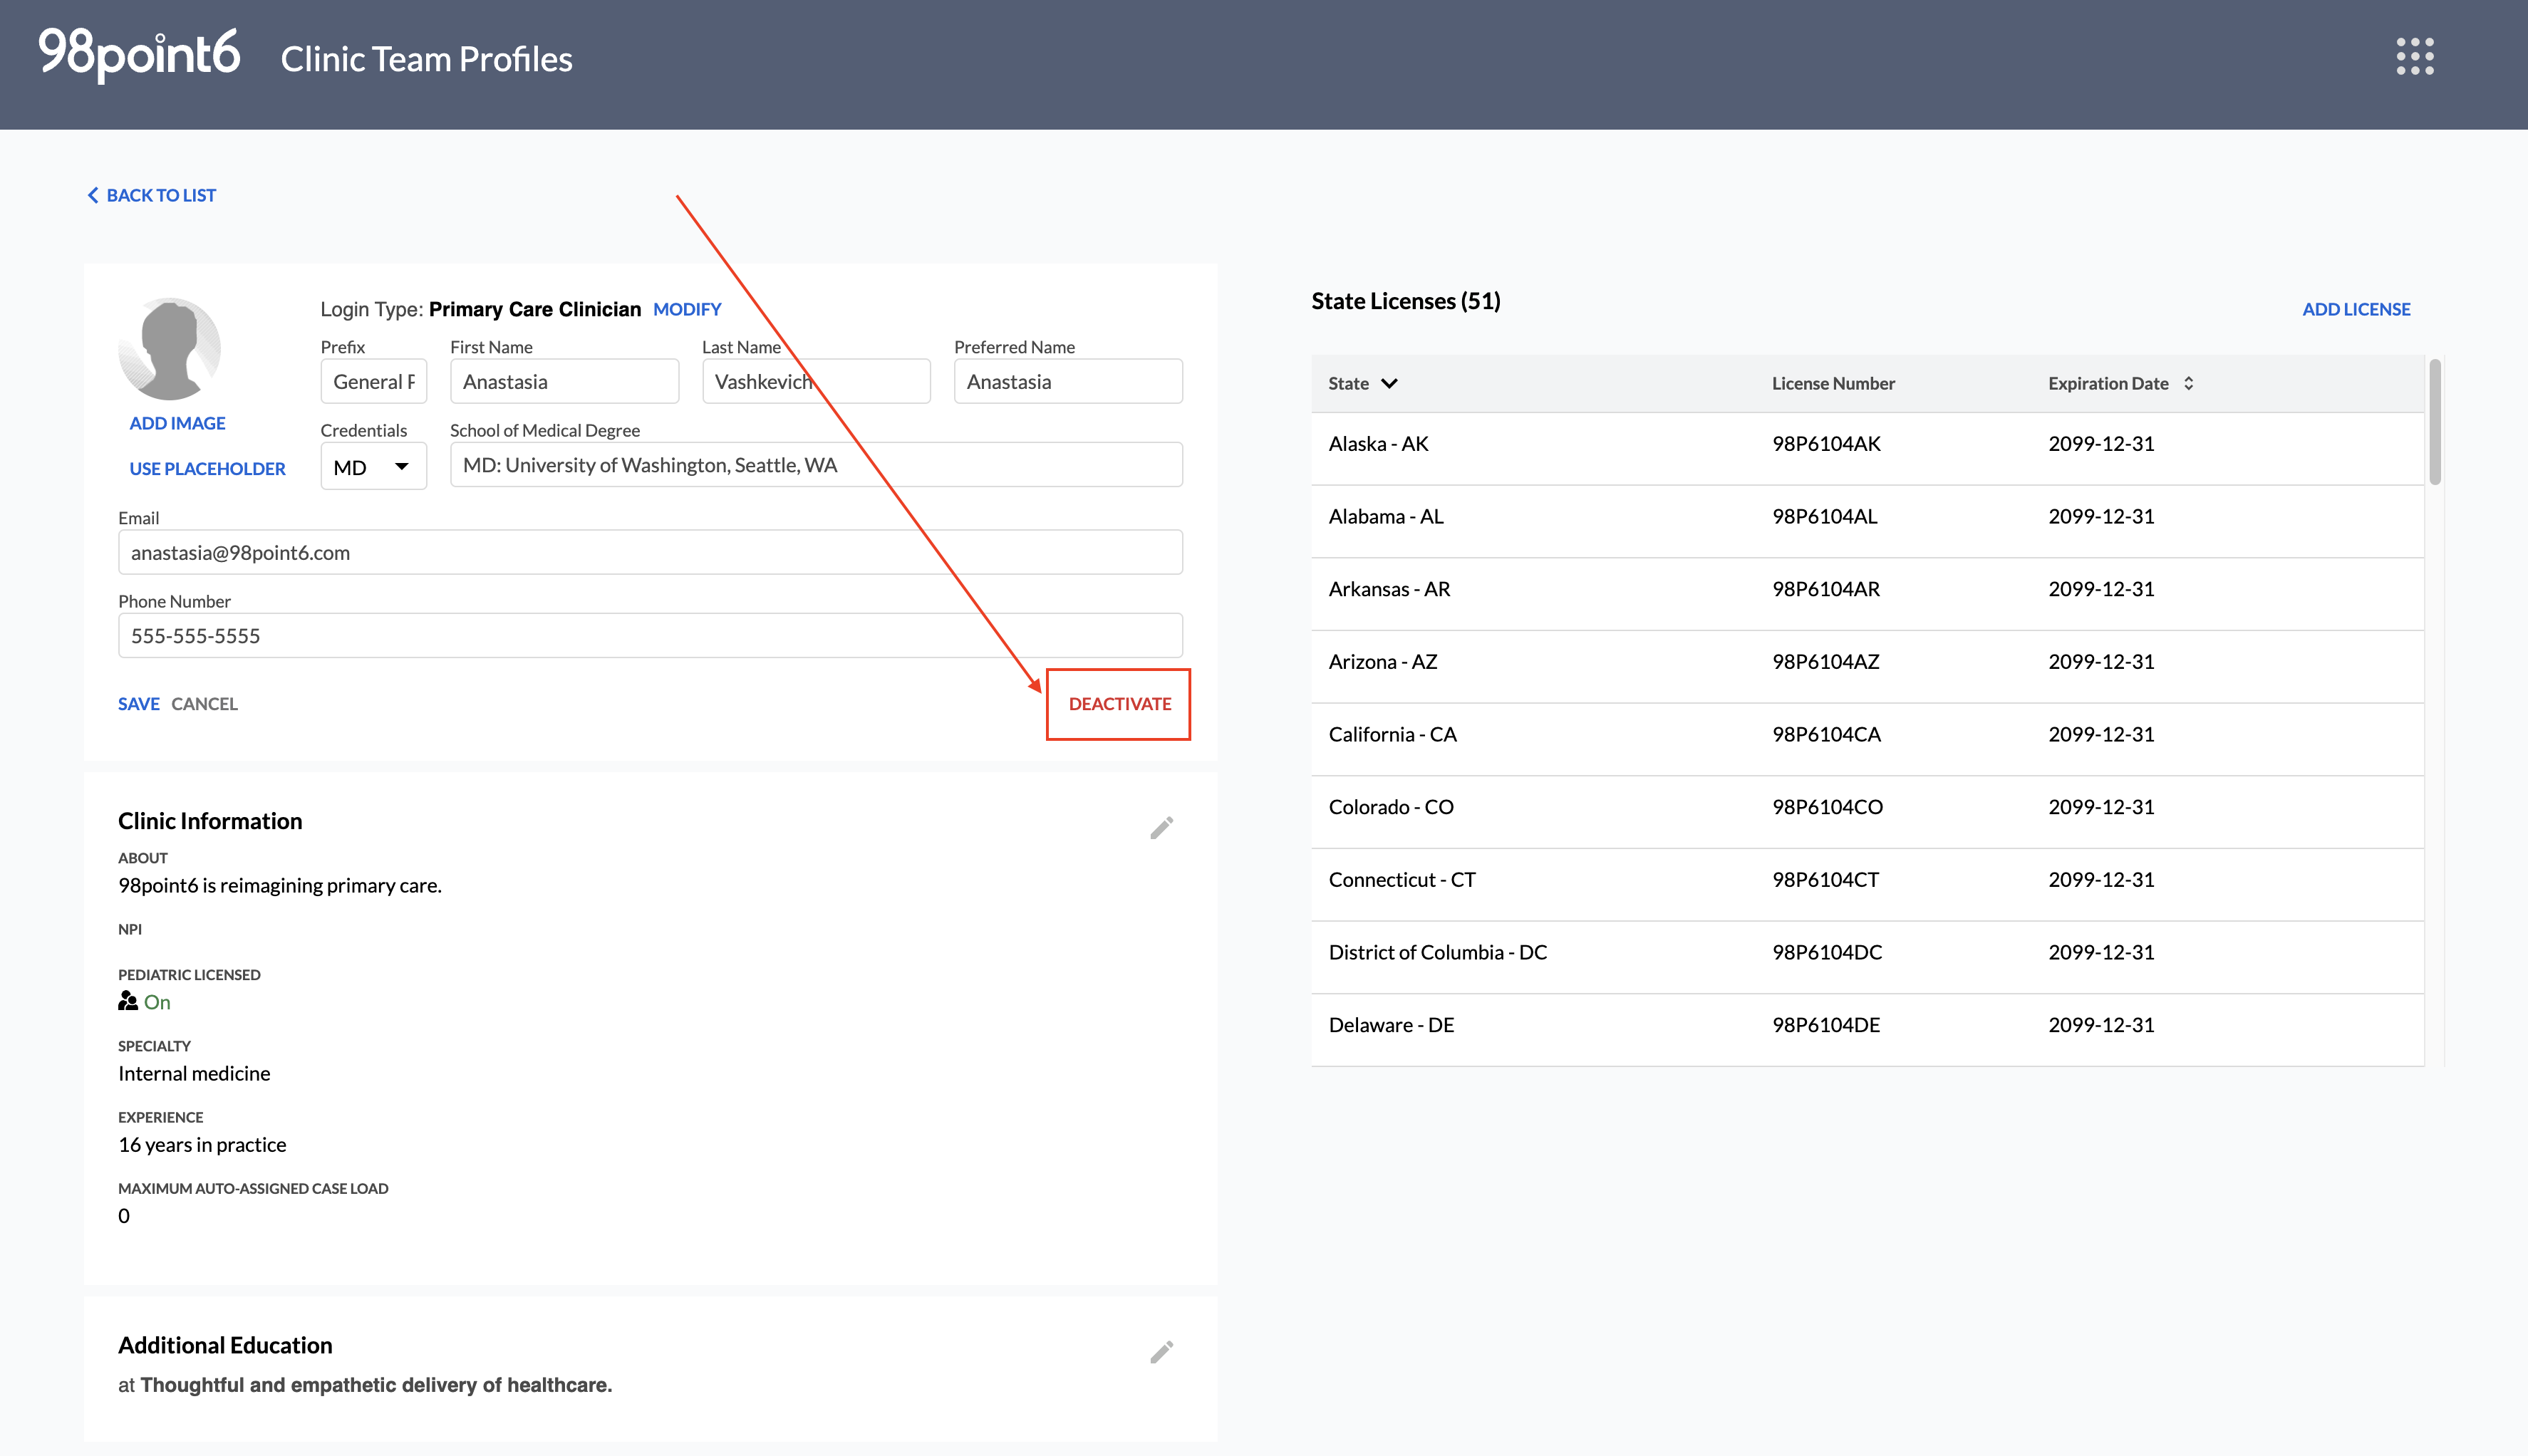
A message displays to confirm that you wish to proceed with deactivation.
Select Deactivation to proceed, or Cancel to cancel the deactivation.
The deactivated profile can now be found within the Deactivated Users list.